Business Challenges
In today's world, a beauty salon (and similar types of businesses) must not only provide quality services but also manage its operations effectively. To meet the growing demands of clients and enhance overall productivity in a competitive market, let’s consider an abstract beauty salon that has set several challenges for itself. These challenges encompass various aspects of business functioning and are aimed at integrating modern technologies into everyday processes.
Integration of the company website into production and accounting processes: The goal is to reduce the number of integrations and improve process quality, which will enable more efficient interactions with clients and optimize internal operations.
Implementation of online booking: There is a necessity to provide clients with the ability to book procedures online, choosing their preferred specialist and a convenient available time slot. This solution also implies the creation of functionality for booking and accounting for free spaces for spa procedures.
Tracking master schedules: Creating a schedule management system that will avoid overlapping appointments and ensure optimal workload for each specialist.
CRM system: Developing a customer relationship management system to account for customer preferences, analyze attendance, as well as integrate with the company website and social media (Facebook, Instagram) for effective advertising campaigns and lead collection for further engagement.
Marketing automation: Setting up a system for email newsletters and SMS notifications to inform clients about new promotions and gather feedback on the quality of services, as well as reminders for upcoming appointments.
Integration with telephony: Implementing functionality to record manager conversations for subsequent automated analysis of their content and compliance with company standards, which will help improve service quality and increase team efficiency.
Loyalty program: Introducing a system allowing clients to accumulate points for visits, which can be exchanged for discounts and free procedures.
Inventory management: Maintaining stock records of associated products, such as cosmetics and care products. This will help control product availability and optimize inventory.
POS system setup: To handle transactions with clients and automate the service process, it is necessary to implement a point of sale system, which will help reduce waiting time during payment.
Accounting: Implementing an accounting system that complies with the standards of the country of residence, which is important for timely reporting.
Analytics and reporting: Developing a dashboard to monitor key performance indicators, such as revenue and specialist workload.
Implementation process
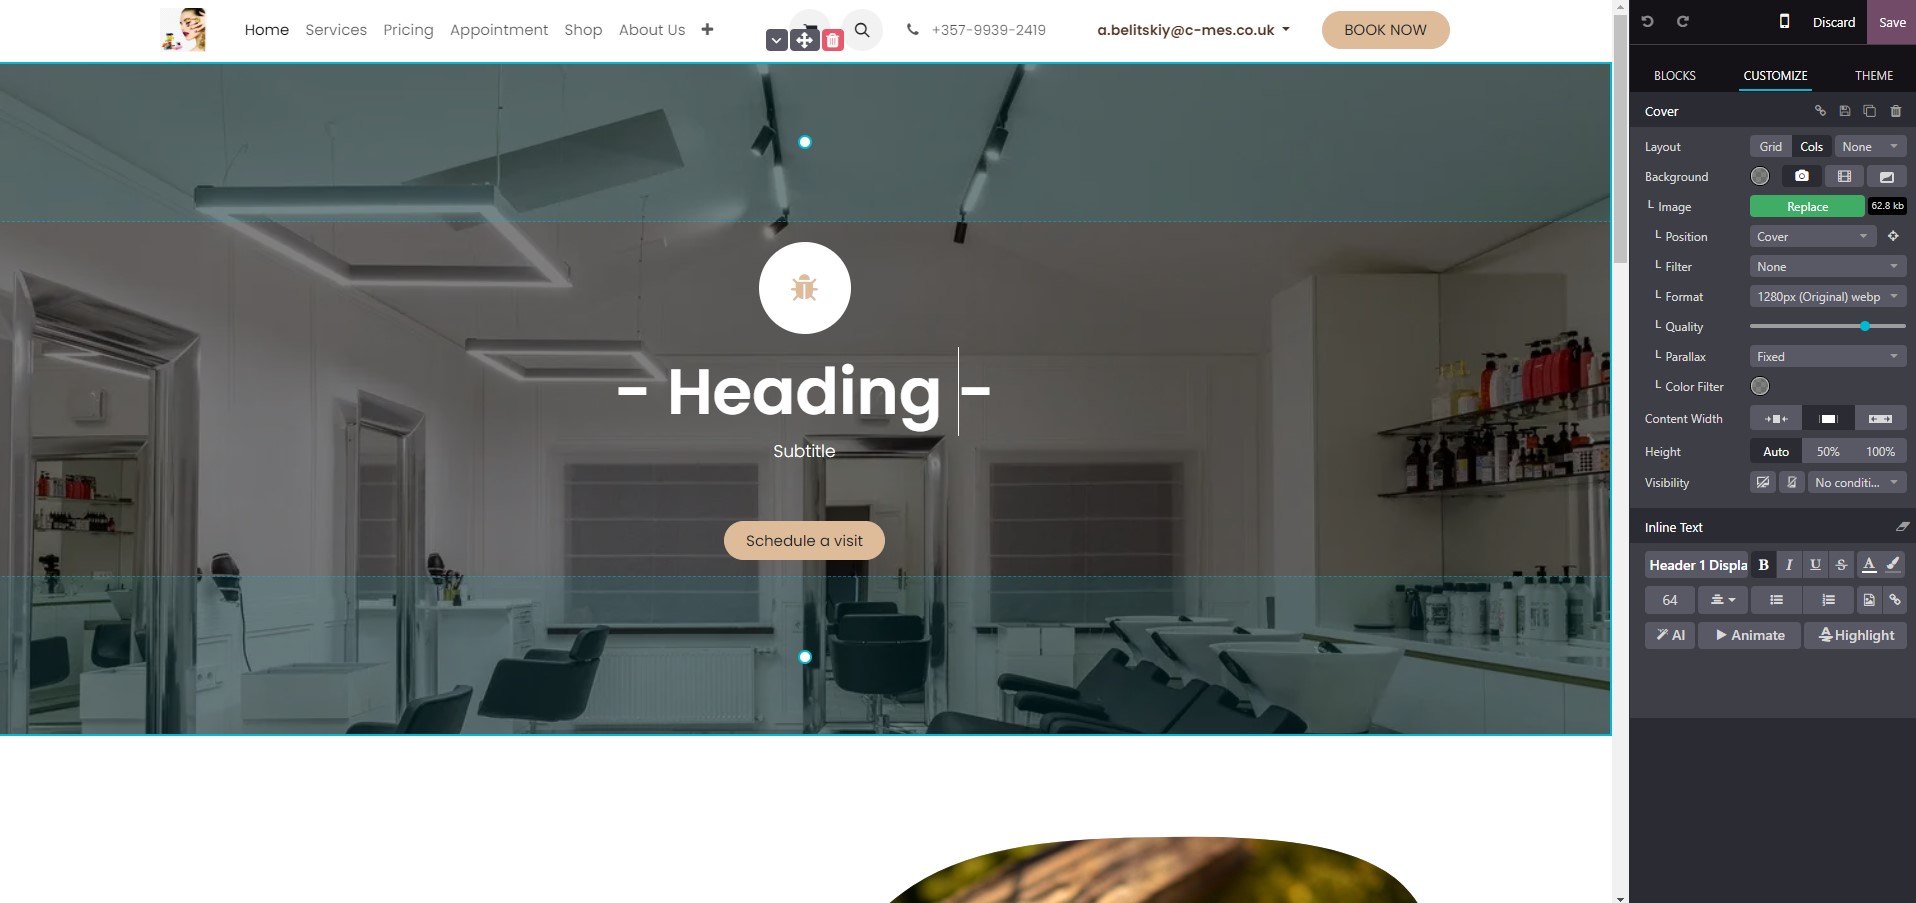
First, we launched the new company website on the Odoo ERP platform.
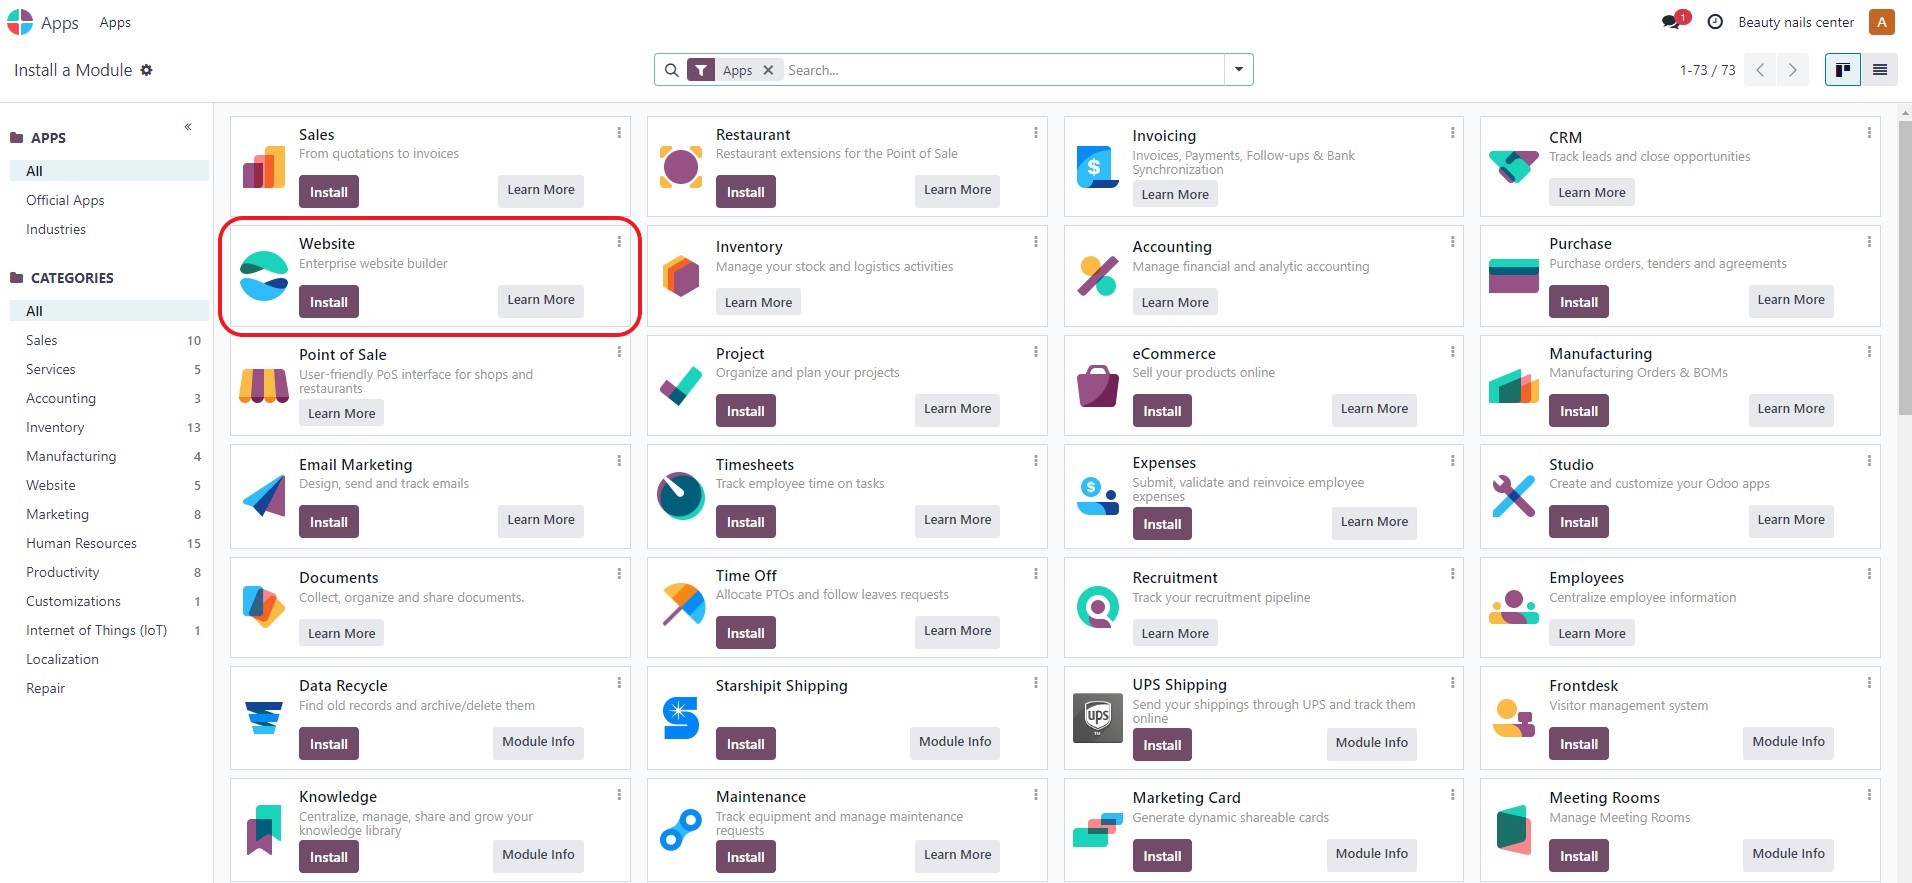
To do this, we installed the standard "Website" module, after which an intuitive website builder started immediately. This powerful tool allows even untrained users to create a website without any special knowledge.
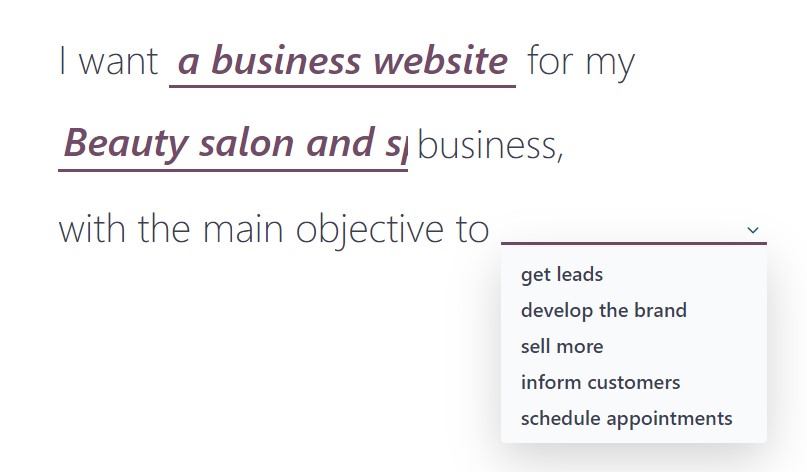
Once the system was launched, users were prompted to specify what type of website they needed, as well as its purpose (for example, the type of business, which is entered manually). Next, we needed to define what goal the future website should pursue by choosing one of the suggested options.
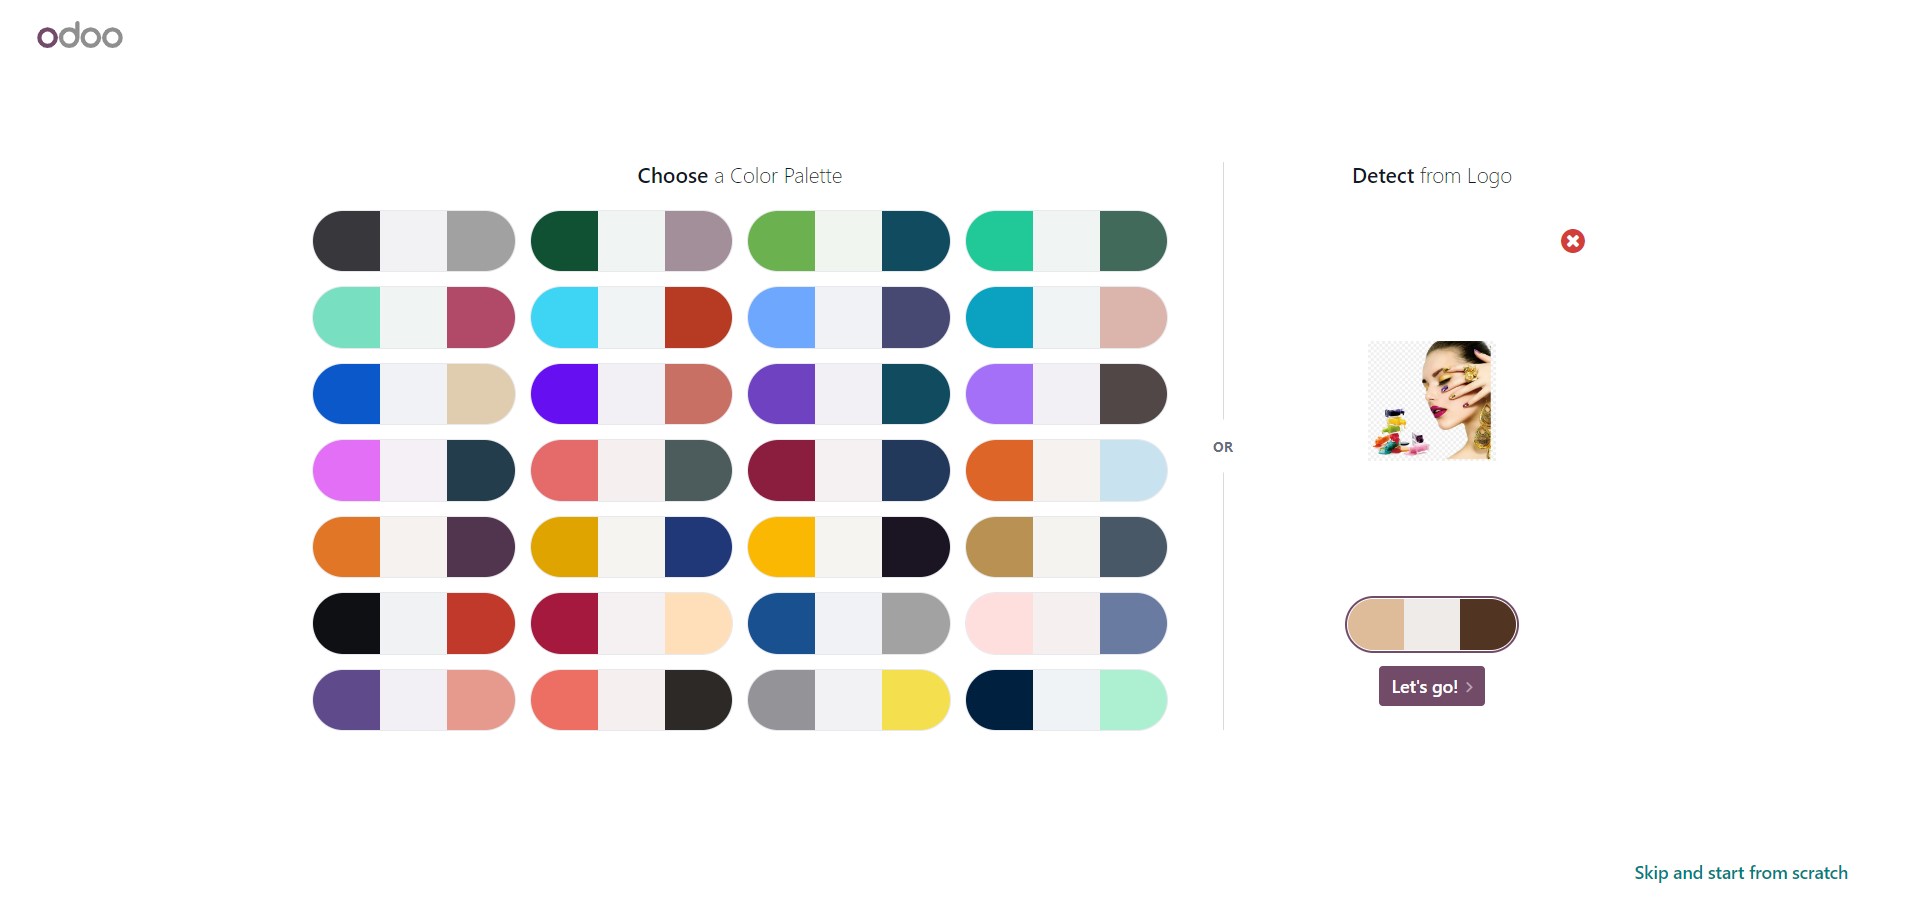
In the next step, we select the color palette for the website or upload a logo, which automatically determines the color scheme for the future resource. It is important to note that this stage determines all styles for the future website elements, but they can be changed and supplemented later through the builder.
After uploading the logo, we proceeded to determine the sections of the future website. We marked the necessary items such as "About Us," "Services," "Pricing," "Shop" (for online sales of related products), "Appointment" (for online reservations), "Career" (to post job vacancies), and "Live Chat" (for online consultations).
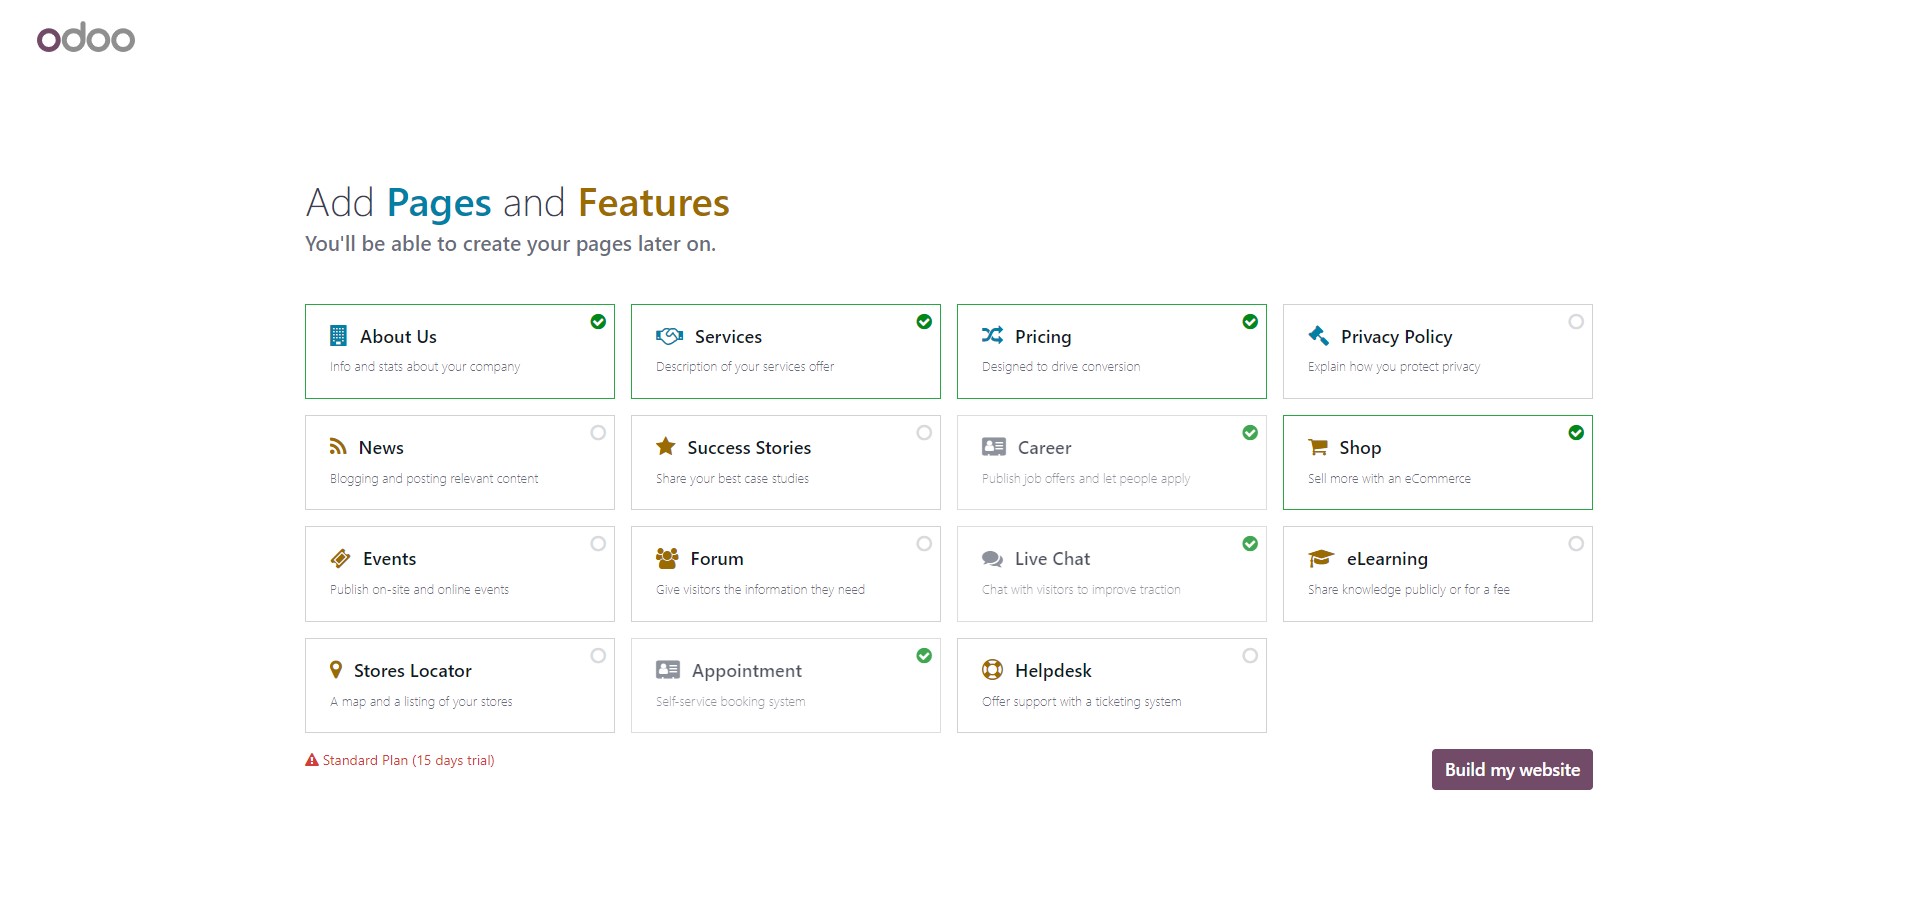
We clicked "Build my website" and waited for the system to process the entered data. After a while, we received a template for the website based on the selected parameters. Editing the website was no more complicated than working with documents in Microsoft Office: we selected an element on the left side of the screen and adjusted its properties in the panel on the right.
Appointments (On-line booking)
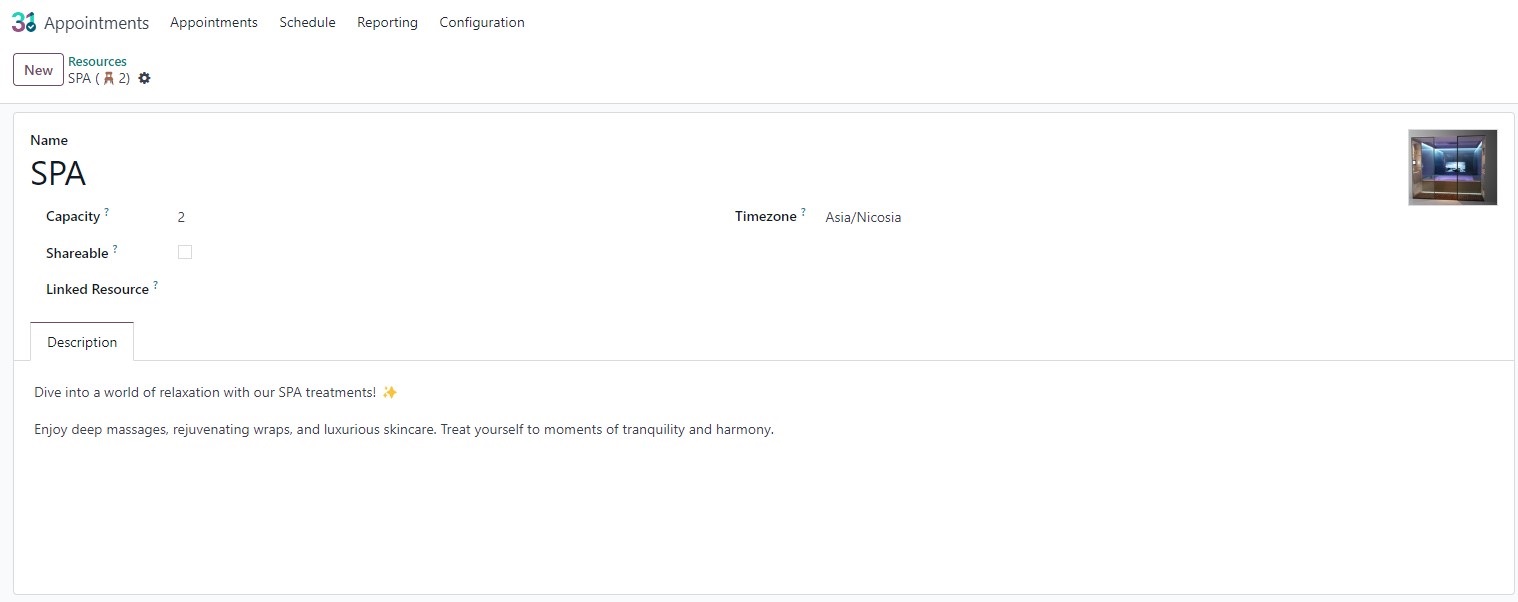
Returning to the main menu of the program, we moved to the "Appointments" section. Here, the first thing we did was fill out the resource list. Resources are the objects for online booking, usually specialists or rooms/equipment, for which a work schedule and occupancy management are necessary. This helps avoid overlaps and ensures effective use of resources.

For each resource, we specified a Name (which will later be used for display on the website), as well as uploaded a photo (for example, of the specialists, so users could choose the one they are used to visiting). We indicated the capacity (the number of independent persons that can use the resource simultaneously) and added additional descriptions.
After setting up the resources, we proceeded to configure the types of appointments.

For each type of meeting, we needed to specify the following parameters:
- Appointment Title – it will be displayed on the website.
- Duration – specify the total time of resource occupation, including preparatory and concluding work.
- Pre-booking time – how many hours before the meeting booking will be available.
- Sheduling window – how many days in advance the appointment will become available for booking.
- Allow canceling – how long before the meeting cancellation will be available without losses for the business.
- Availability on – what will be booked during the appointment.
We choose the resource and specify which resource will be booked. We also indicate the maximum number of persons who can be booked simultaneously, ensuring they are independent persons. The booking method can be chosen—either first select the resource to be booked and then choose the time slot, or select the time first, and then the system automatically assigns a free resource.
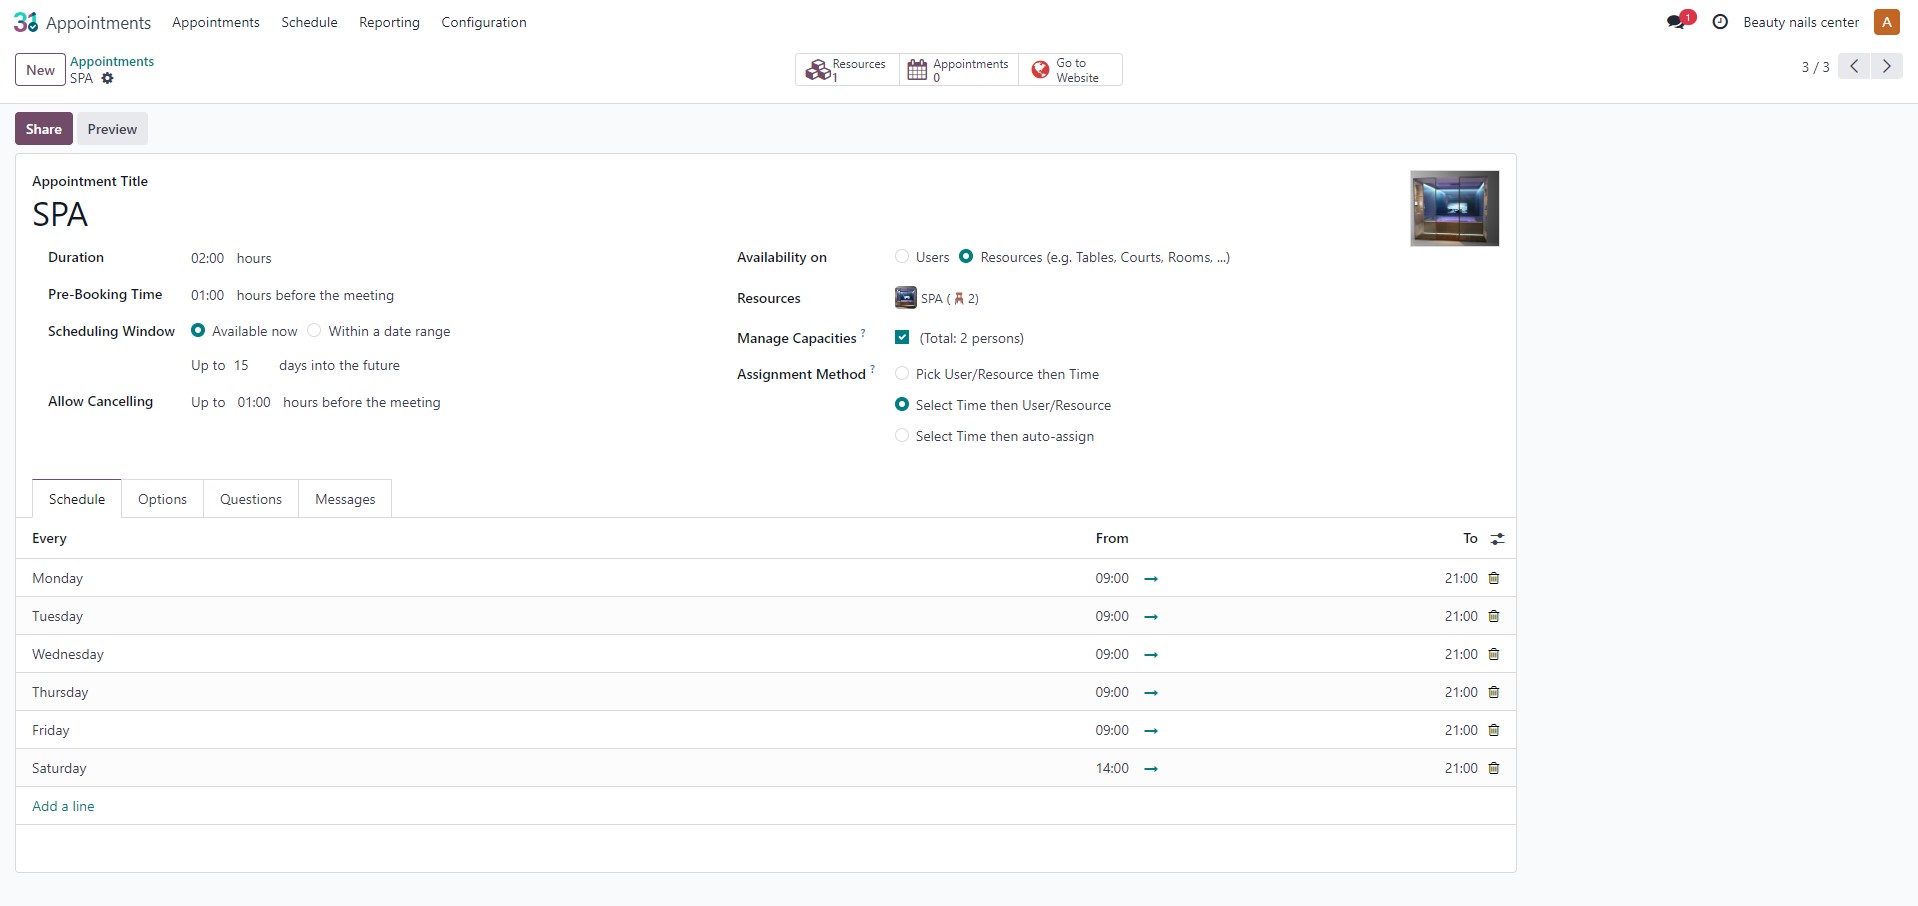
In the additional tabs, we edited information about the schedule, the time intervals available for this booking (with individual schedules for each resource), the time zone for coordinating booking times, and manual confirmation of new bookings. Reminders can also be tailored to the company's requirements.
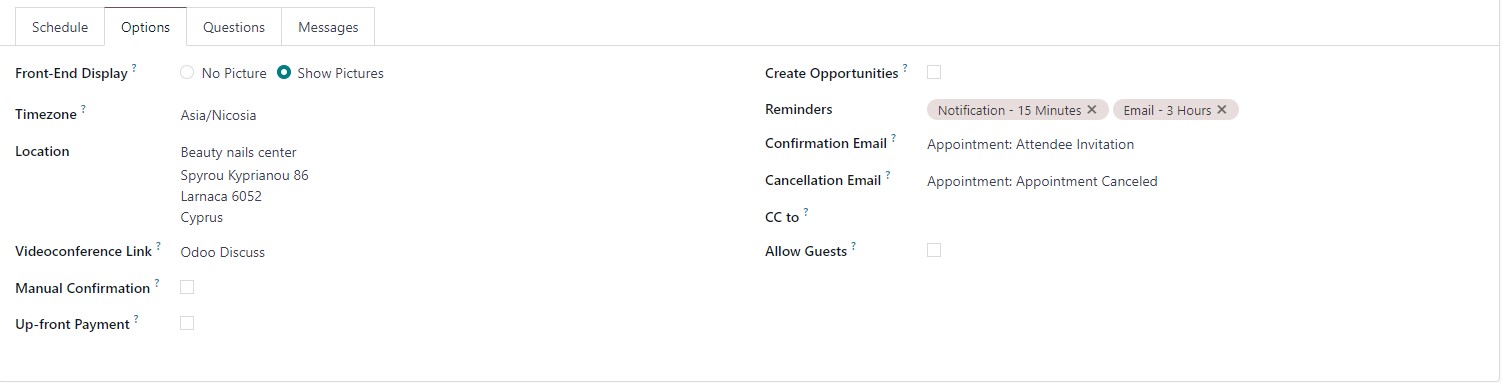
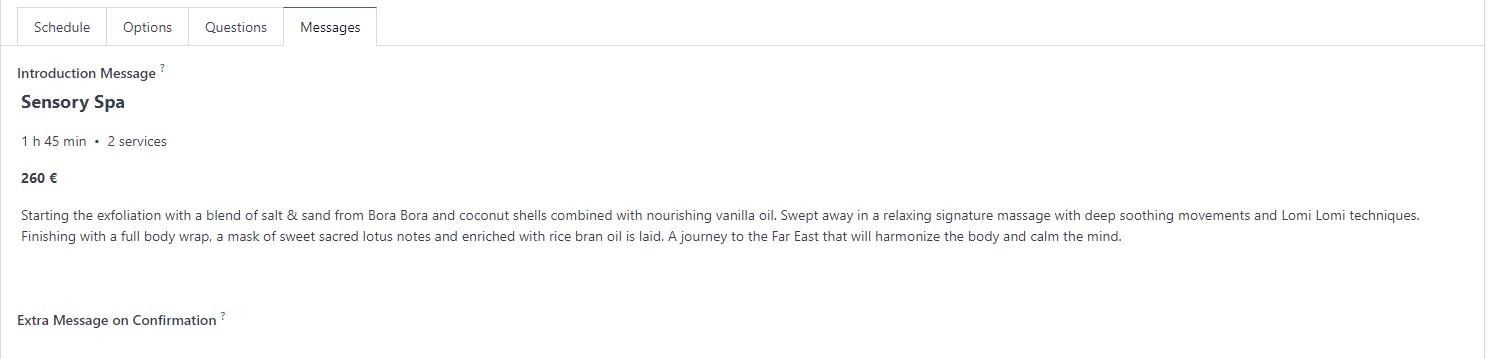
In the "Questions" tab, we formed a list of questions that users answer at the time of online booking. This could include information about allergies and other important details. Answers are saved in the client's history.

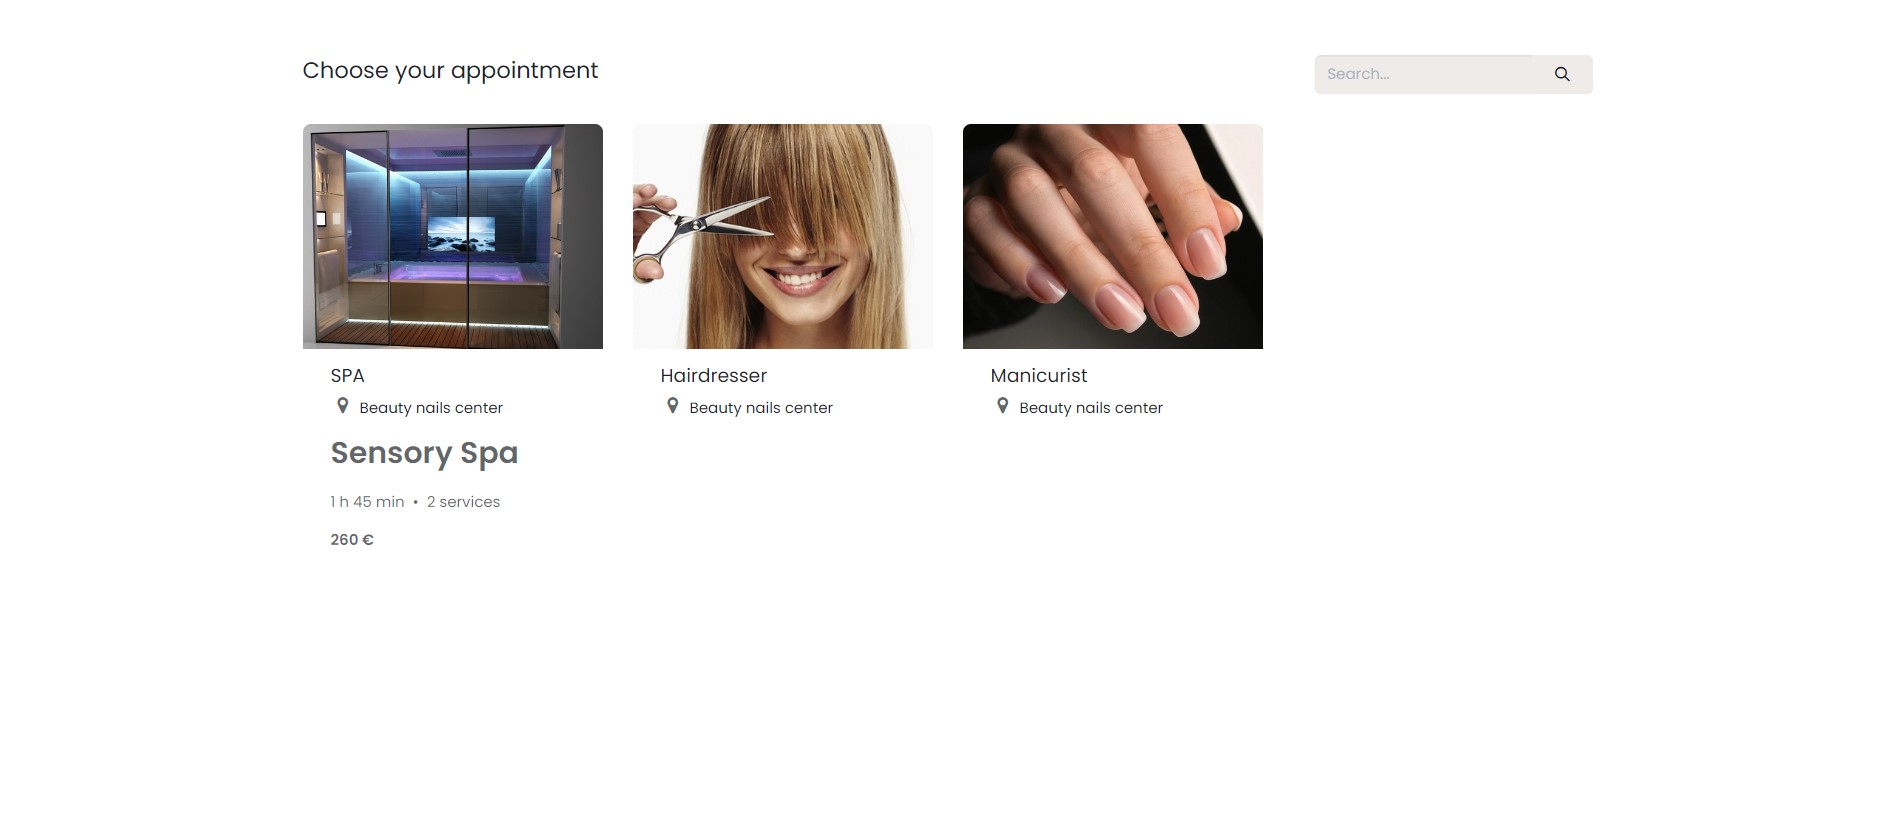
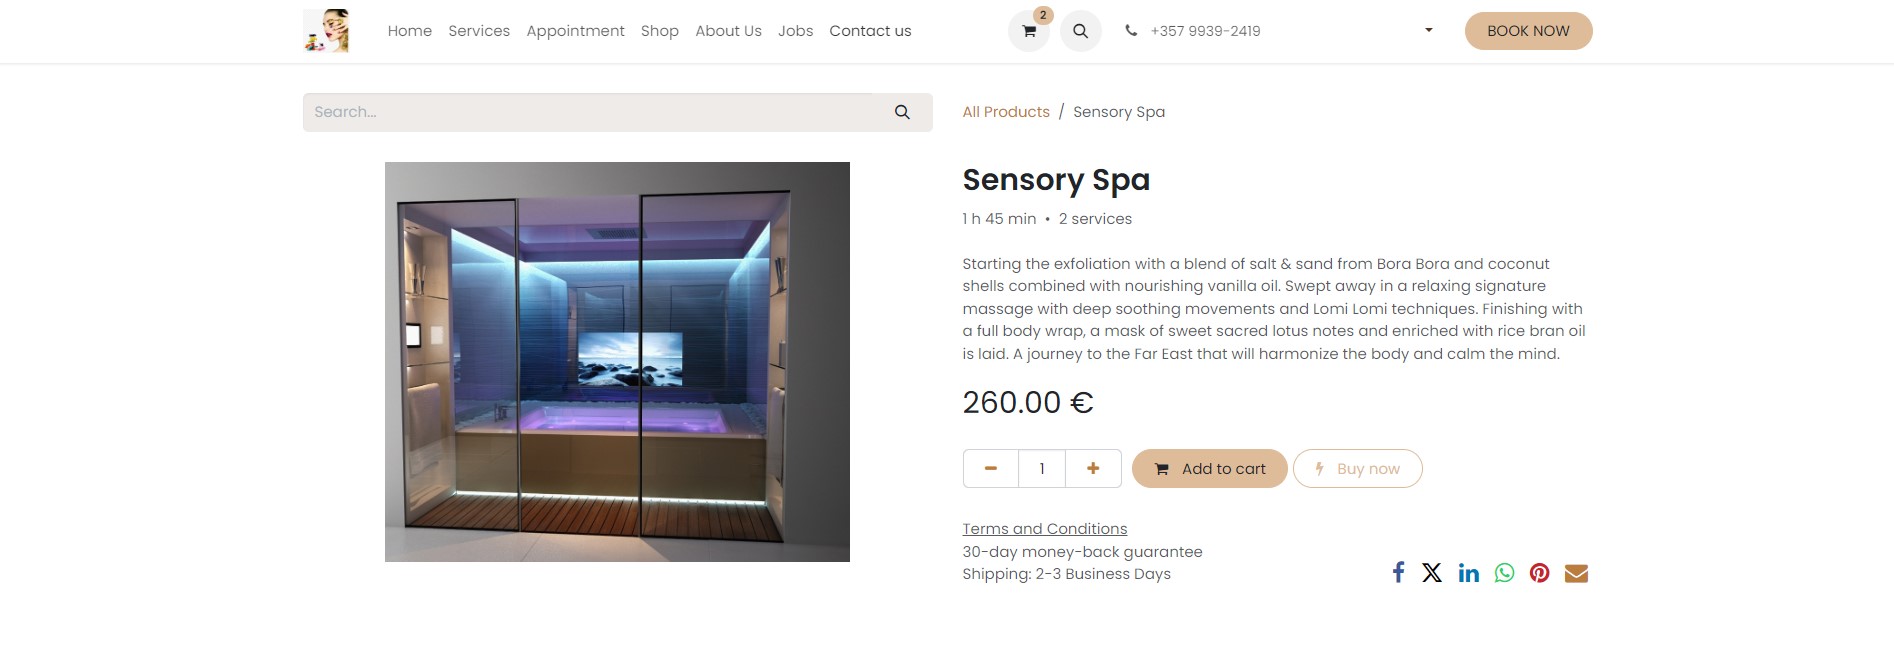
The "Messages" section allows detailing the appointment description (price, duration, and procedure description) for display on the website. After publishing on the website, our types of appointments appear in the "Appointments" section.
Working with the system proceeds as follows: the client accesses the website, selects the type of procedure or service, and depending on the settings, moves on to the next step.
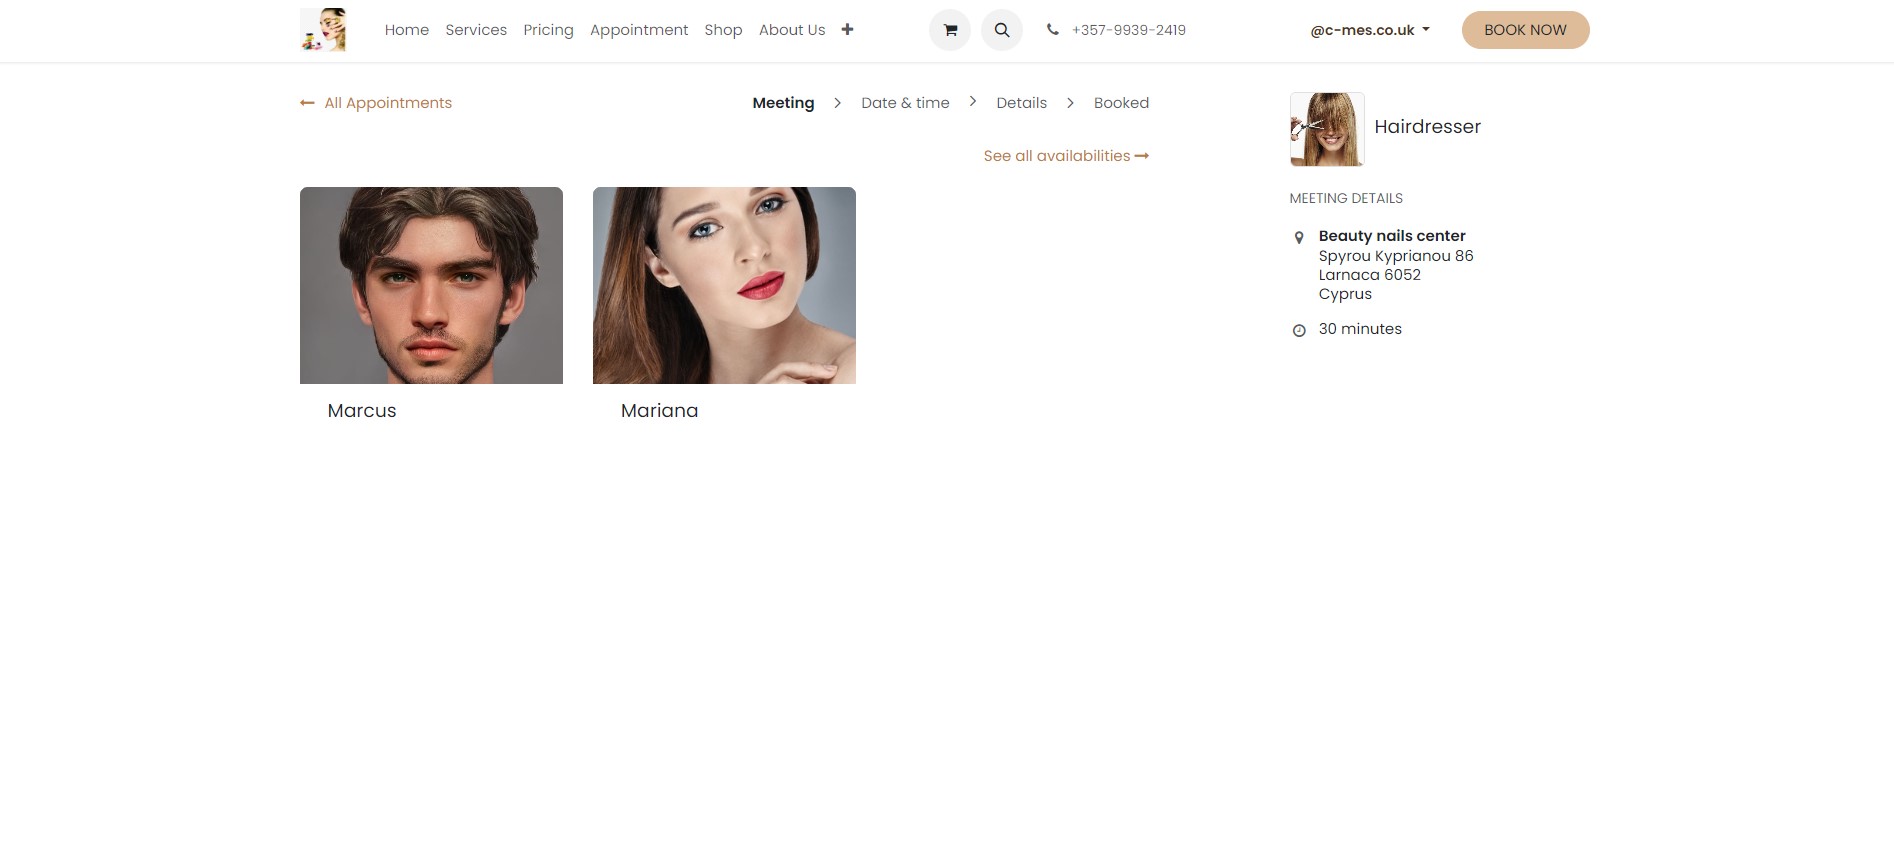
If resource selection (in this case – a specialist) is necessary, the client chooses one from those available in the settings.
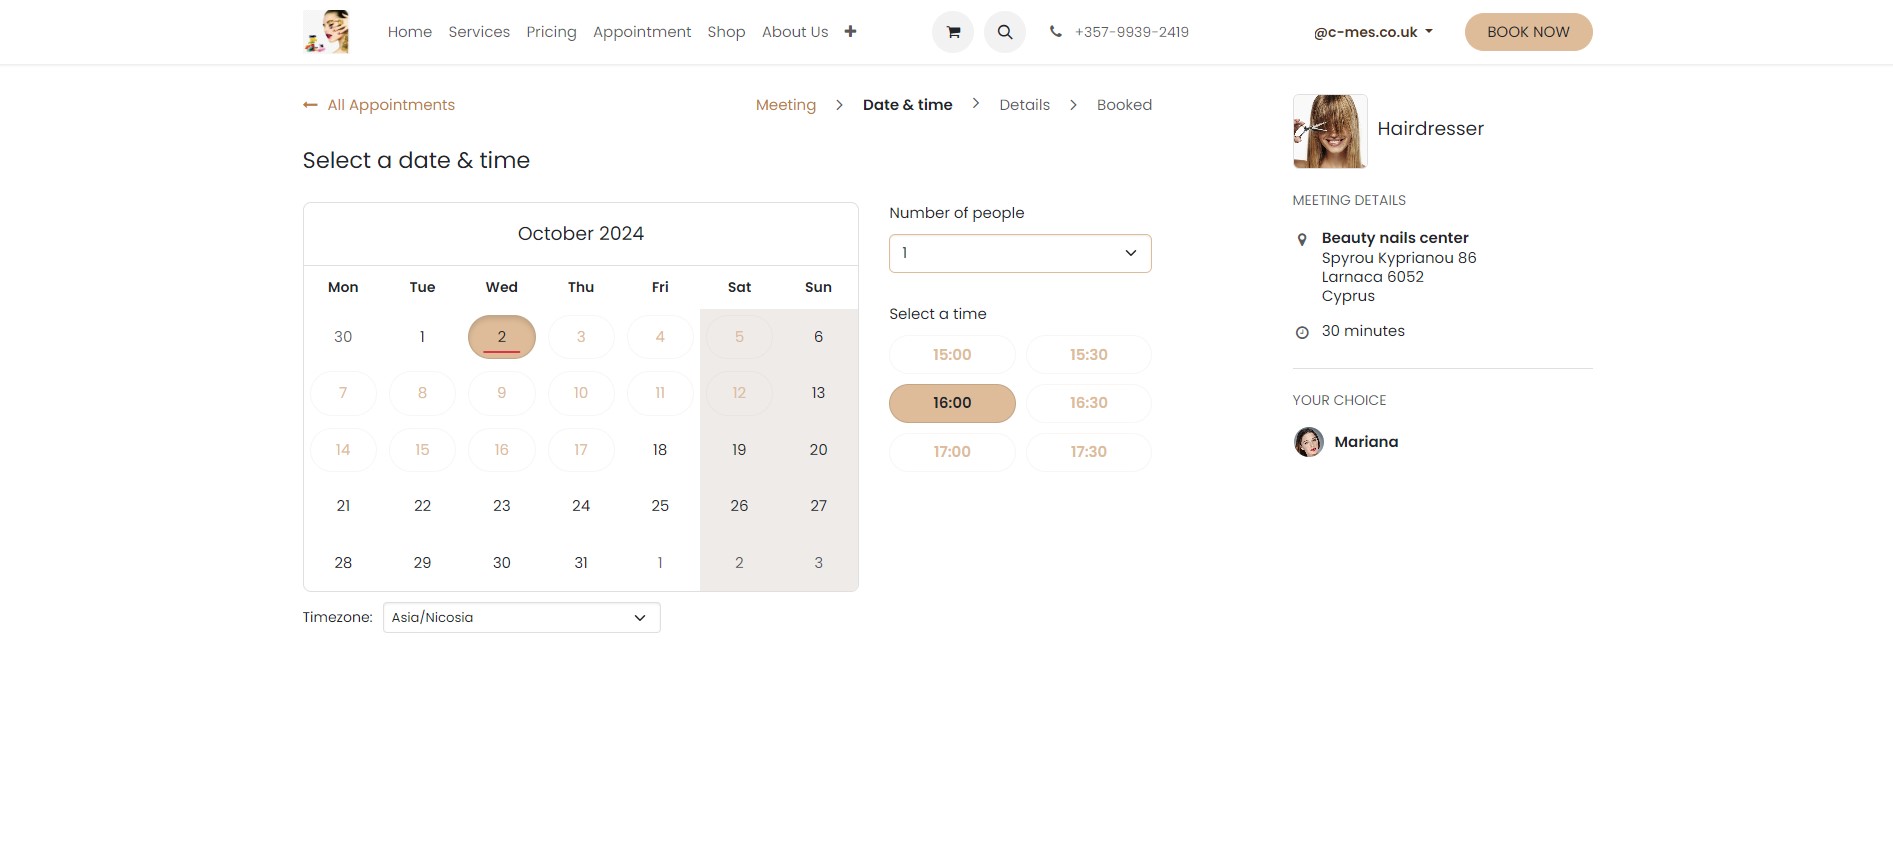
On the next step, the client selects the date and time from the list available for that particular specialist.
Then, they fill out their contact information (upon first booking, the information is saved for future use) and answer the necessary questions if any.
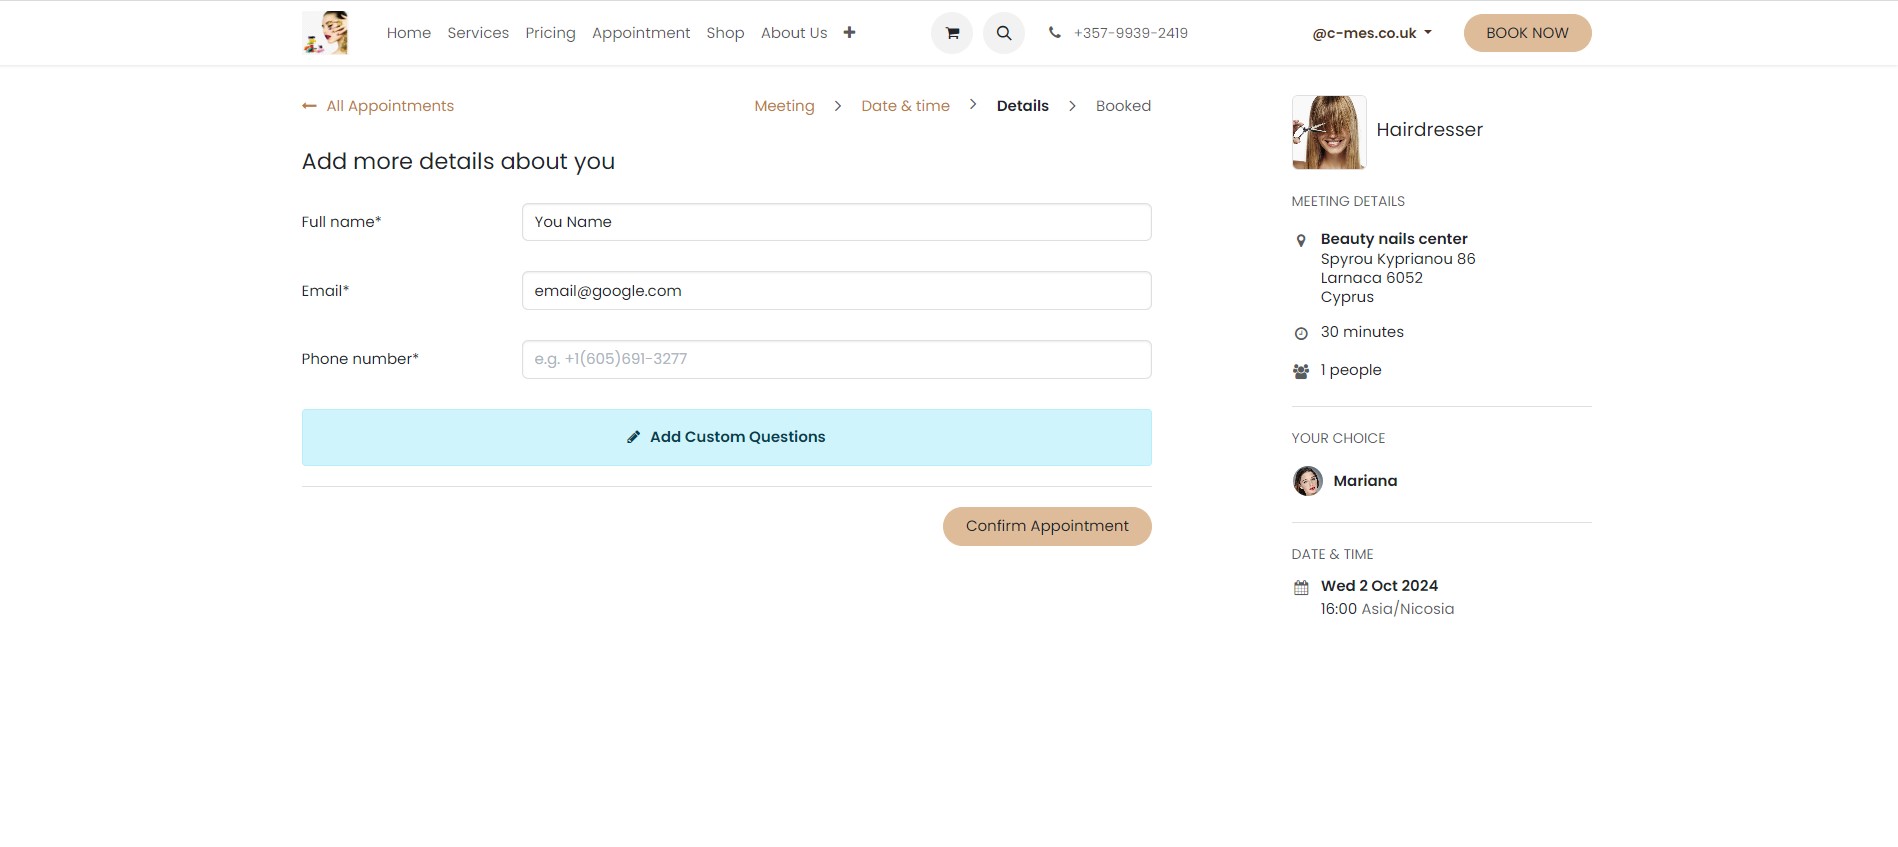
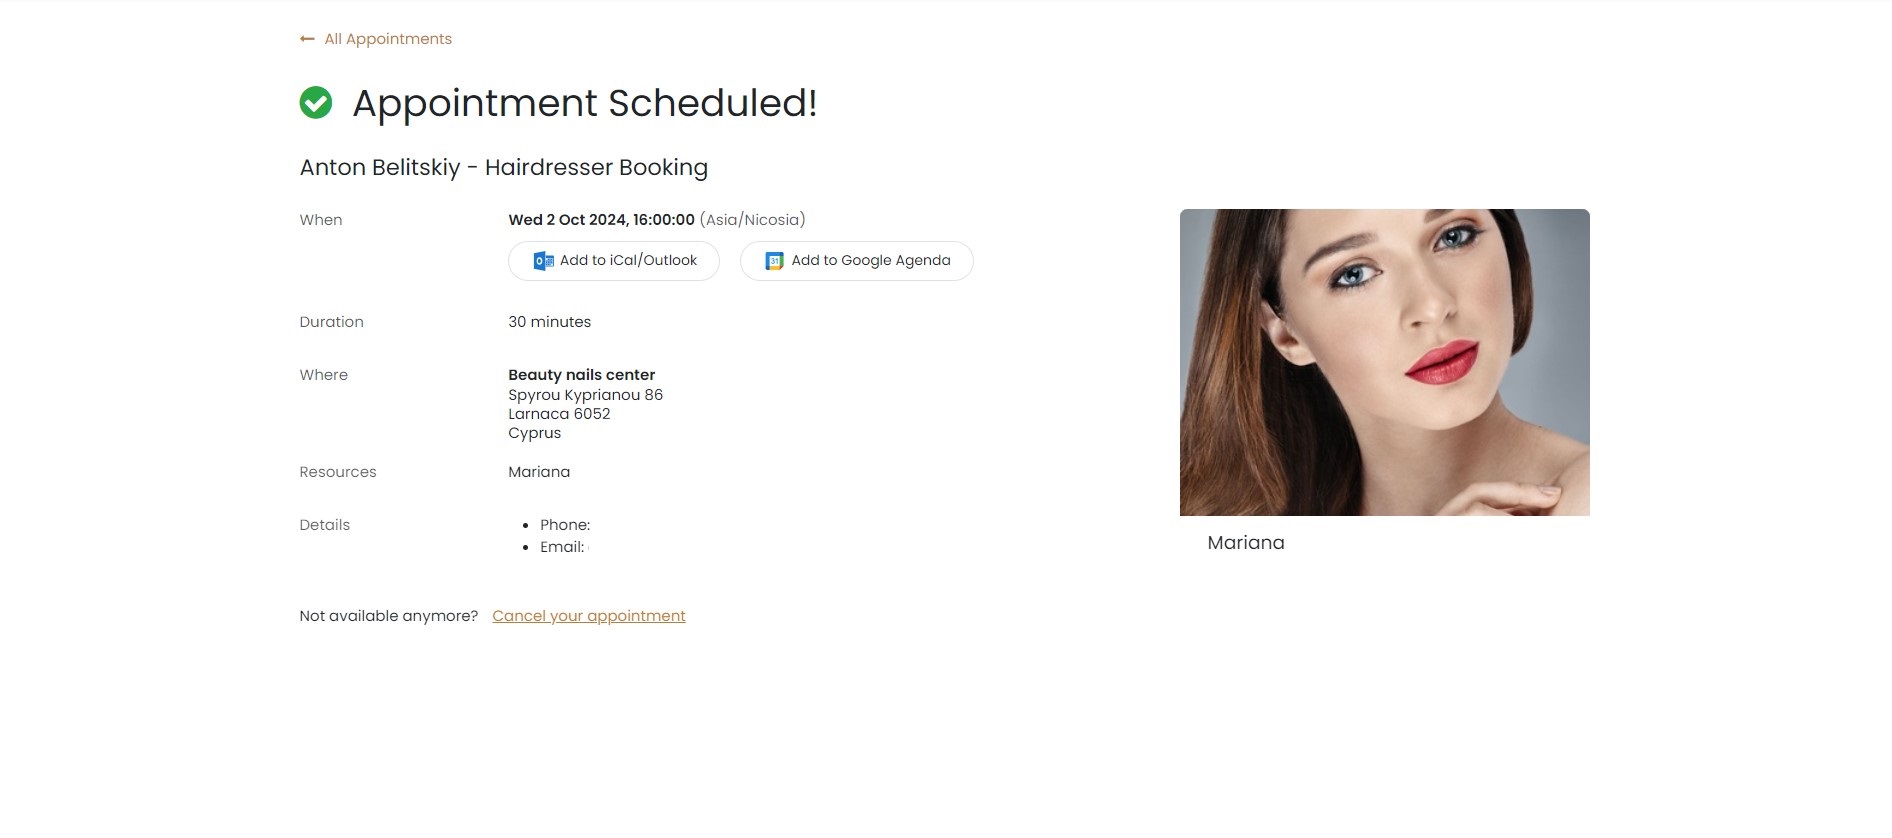
After that, the booking confirmation occurs. A notification about the booking and a calendar tag are sent to the specified email.
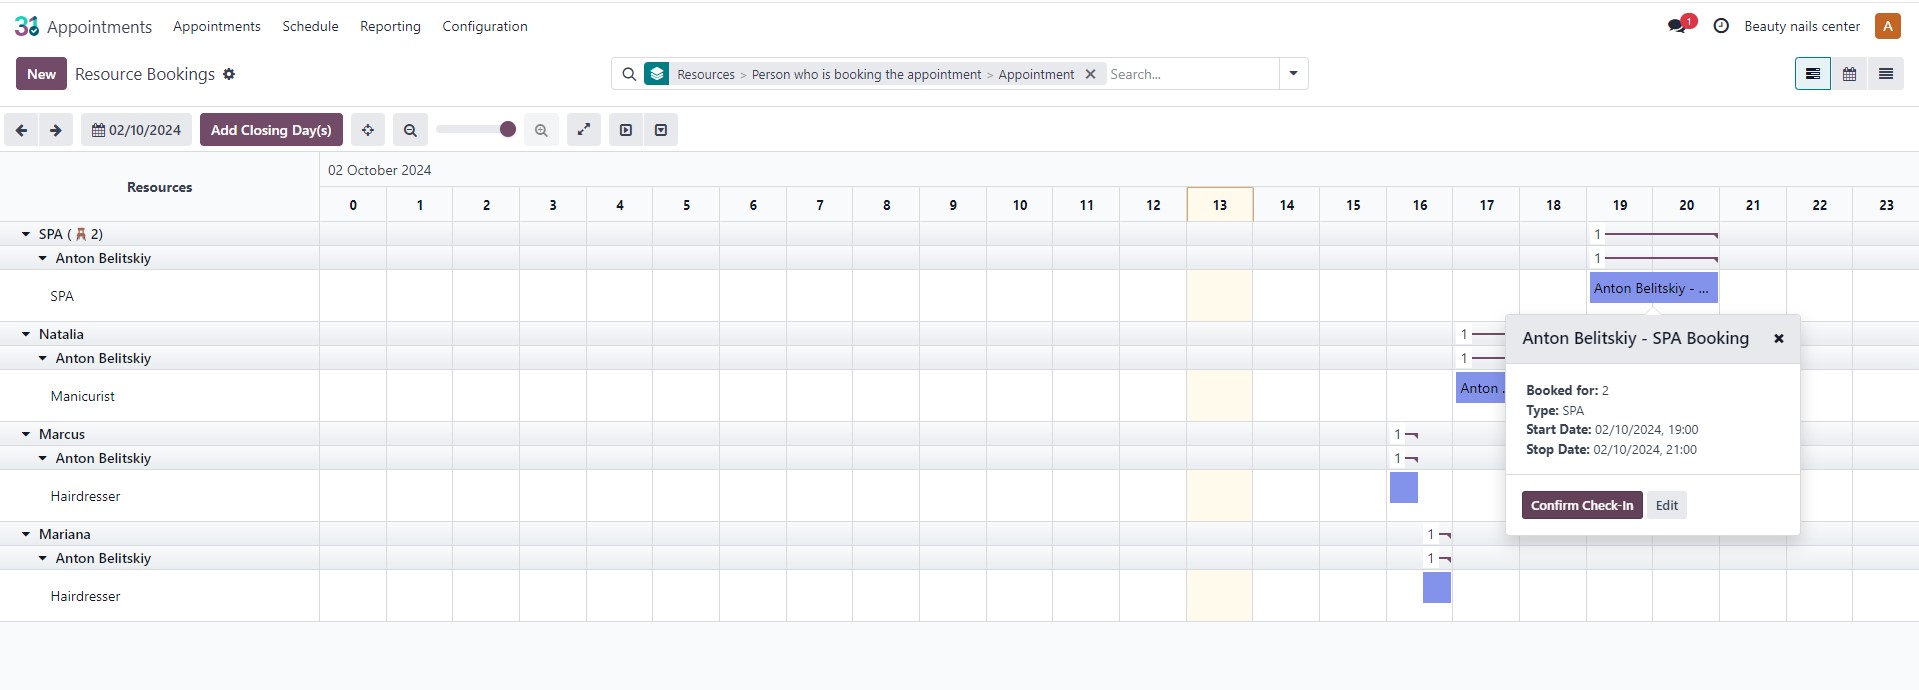
All incoming online bookings are immediately reflected in the resource loading schedule. Additionally, a manager can manually enter records when receiving phone calls or SMS messages. From the resource loading schedule, one can view and edit booking information, including confirming records that require "manual confirmation." If a client does not show up at the scheduled time, the manager contacts them to reschedule or cancel the booking.
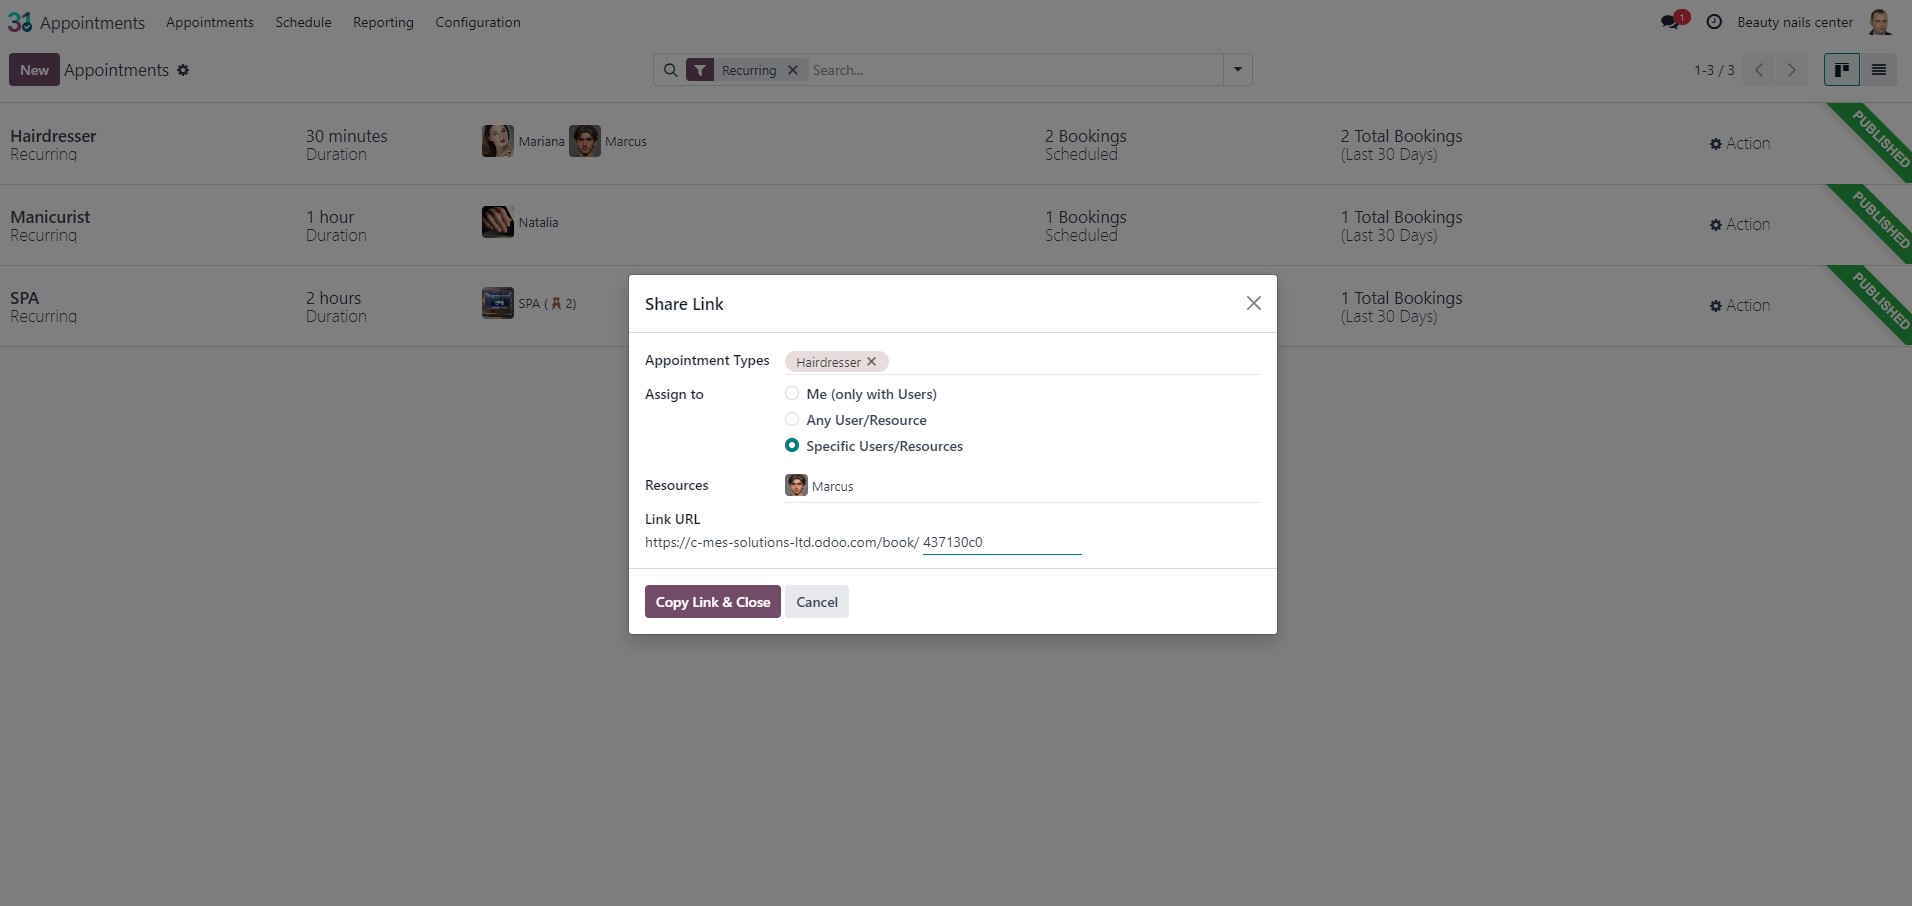
Additionally, each type of booking allows the creation of a link that can be inserted into messages, including social media, and placed in advertisements. If a client saves this link, they will be able to make a booking at any convenient time, going directly to select the meeting time without intermediate steps.
CRM
When booking online, a client card is automatically created based on the filled-out data. Client cards are also created during self-registration on the client portal or when sending a message through the "Contact Us" form.
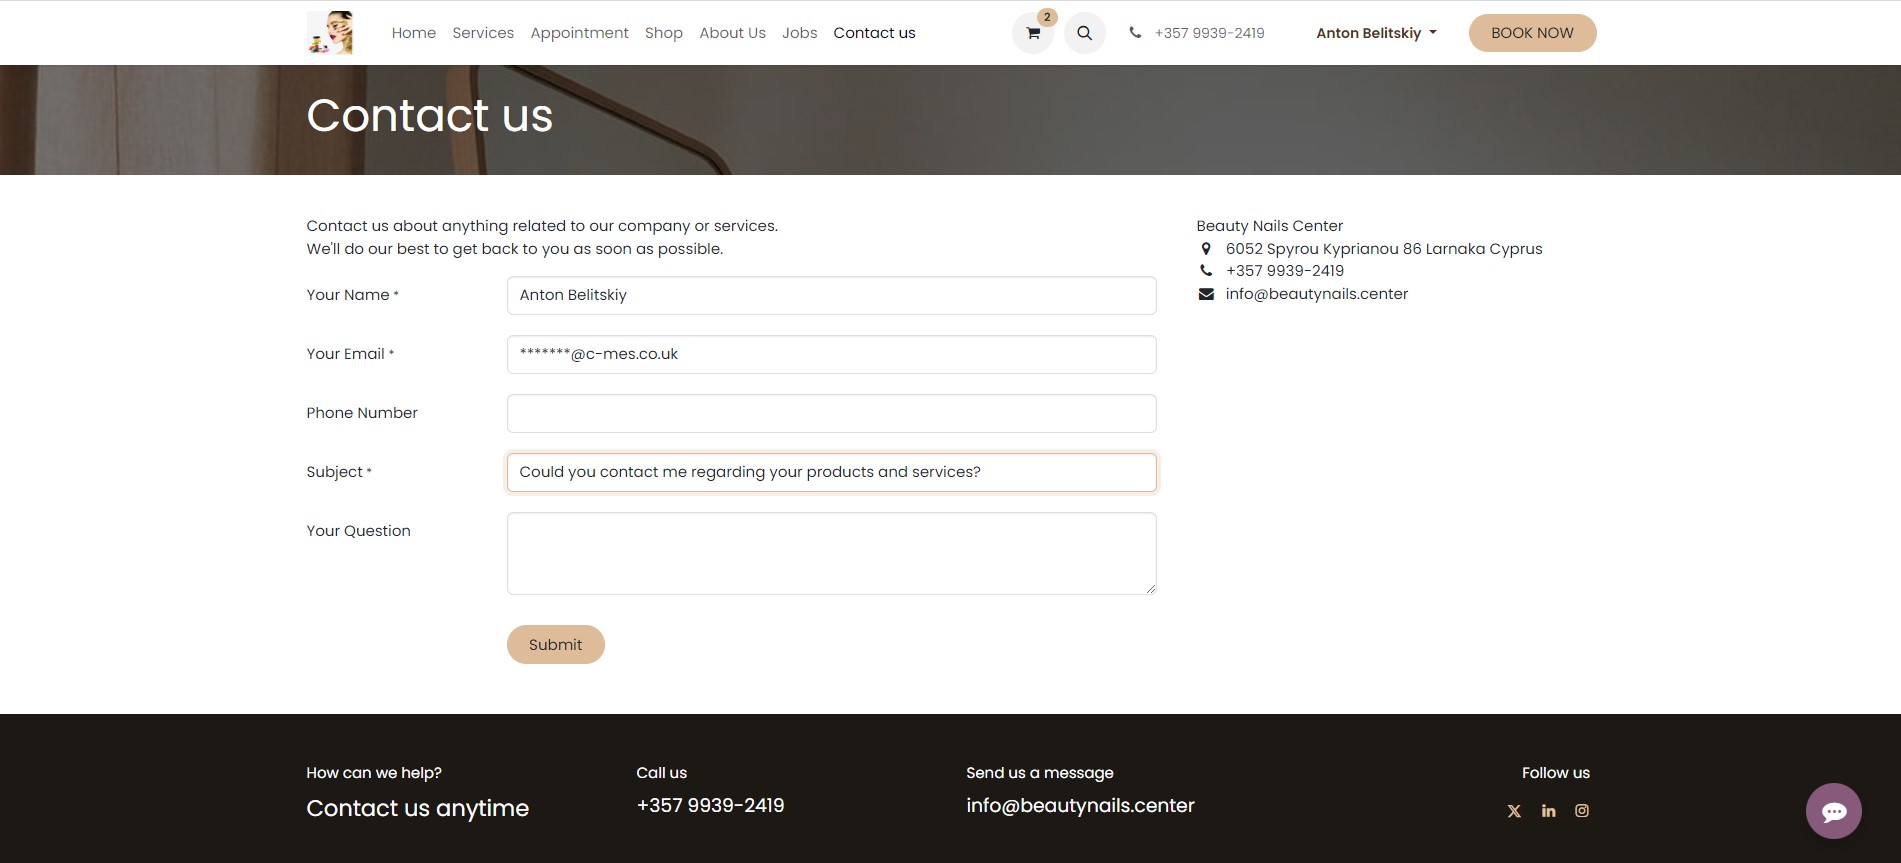
In this case, a new contact and lead are generated in the CRM system.
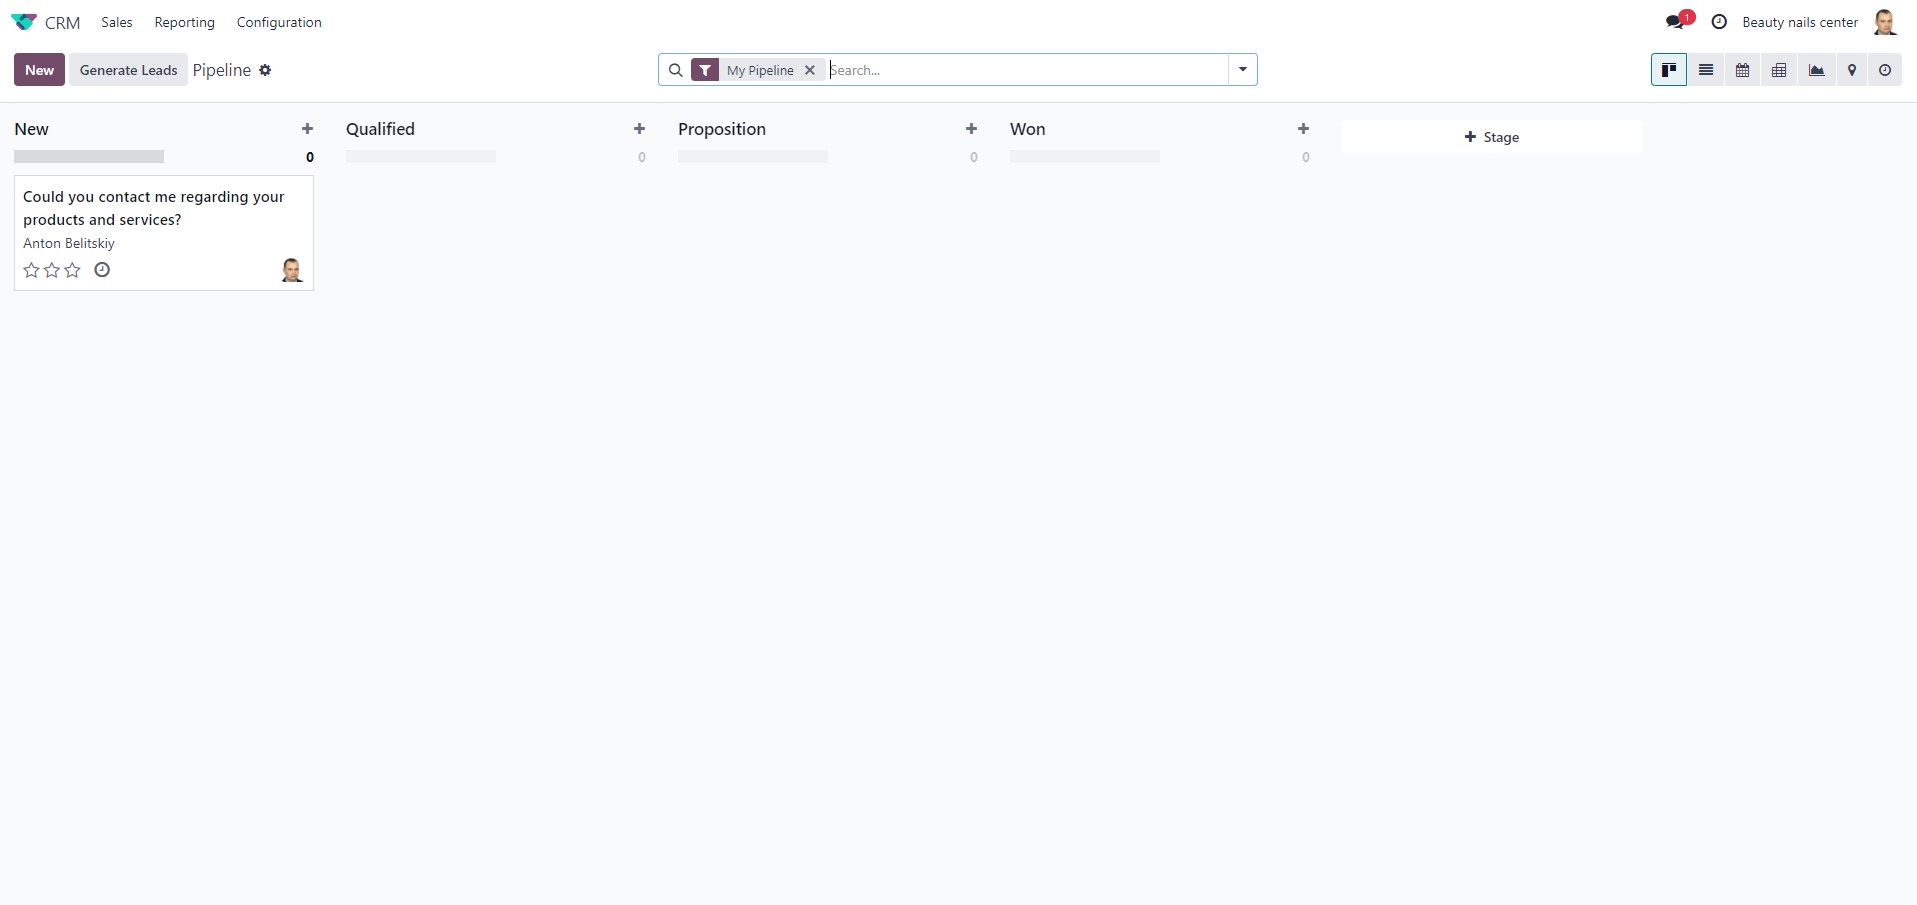
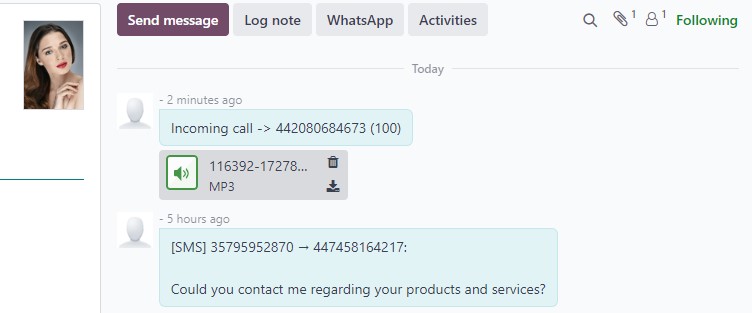
All interaction history with the client is reflected in the system. Email correspondence and notifications are automatically recorded, and for integration with a digital PBX, configuration is required on the PBX side. We used the Zadarma.com PBX, which has standard modules for integration with Odoo ERP. In this case, the entire history of calls and SMS correspondence is also preserved. When an incoming call comes from a number not matched with any contact, a new contact and lead are created.
Leads for the CRM system can also be collected through the "Social Marketing" module, which supports integration with Facebook, Instagram, LinkedIn, YouTube, and Twitter.
Inventory
Next, we proceed to set up the list of services provided, which is done in the "Products" directory. Here, we also enter information about related products sold in the salon or on the website. We fill out the description of the service/product, tax rates, categories, and other parameters.
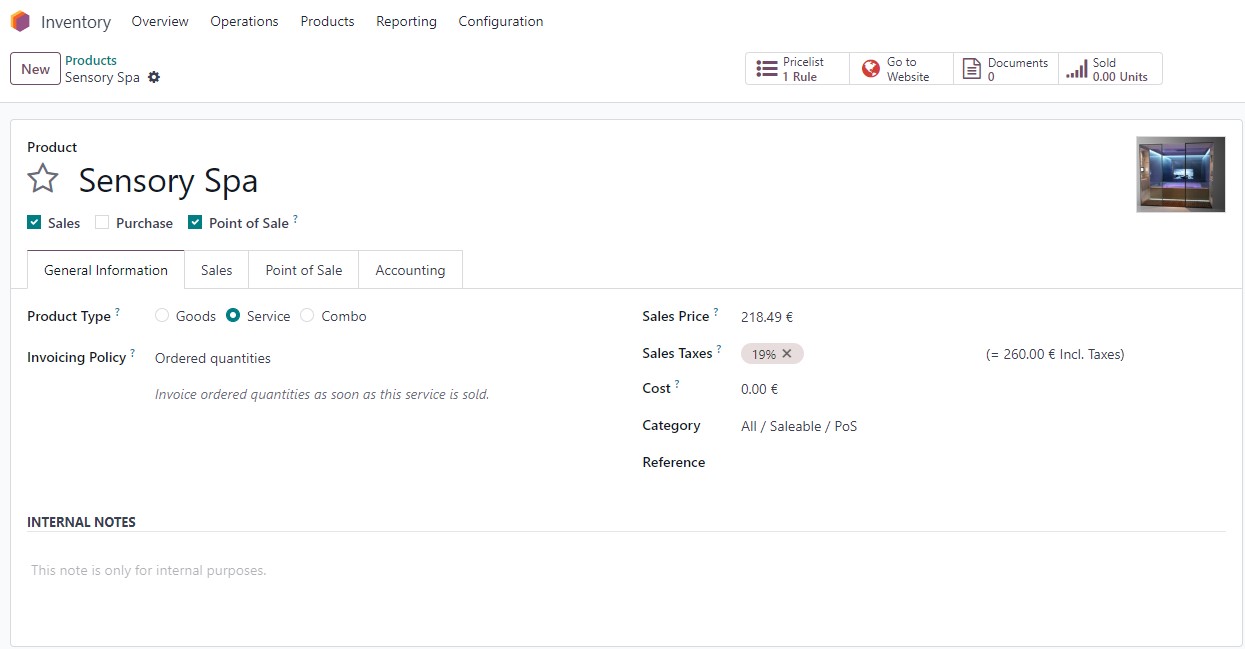
By clicking the "Website" button, we check how the product will be displayed in the online store. If necessary, the product page can be supplemented using the website builder.
Now, let's describe the inventory accounting in the system in more detail. To sell something (other than services), it must first be purchased. We go to the "Inventory" module and create a new delivery in the receipts list, using the barcode module for automatic document filling.
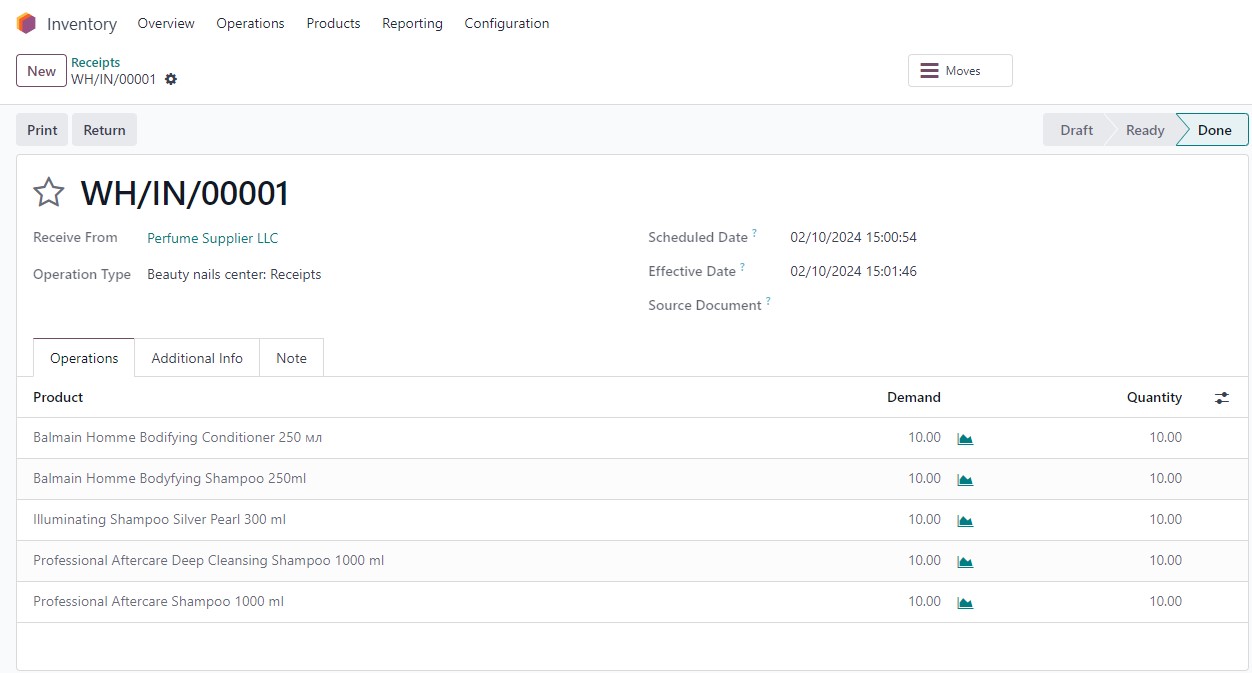
After confirmation, the delivery appears in the list, and it can be revisited later. At this point, we increase the stock levels of the received products. When receiving an invoice from the supplier, it needs to be registered in the "Accounting" module as a supplier invoice, which creates a liability to the supplier.
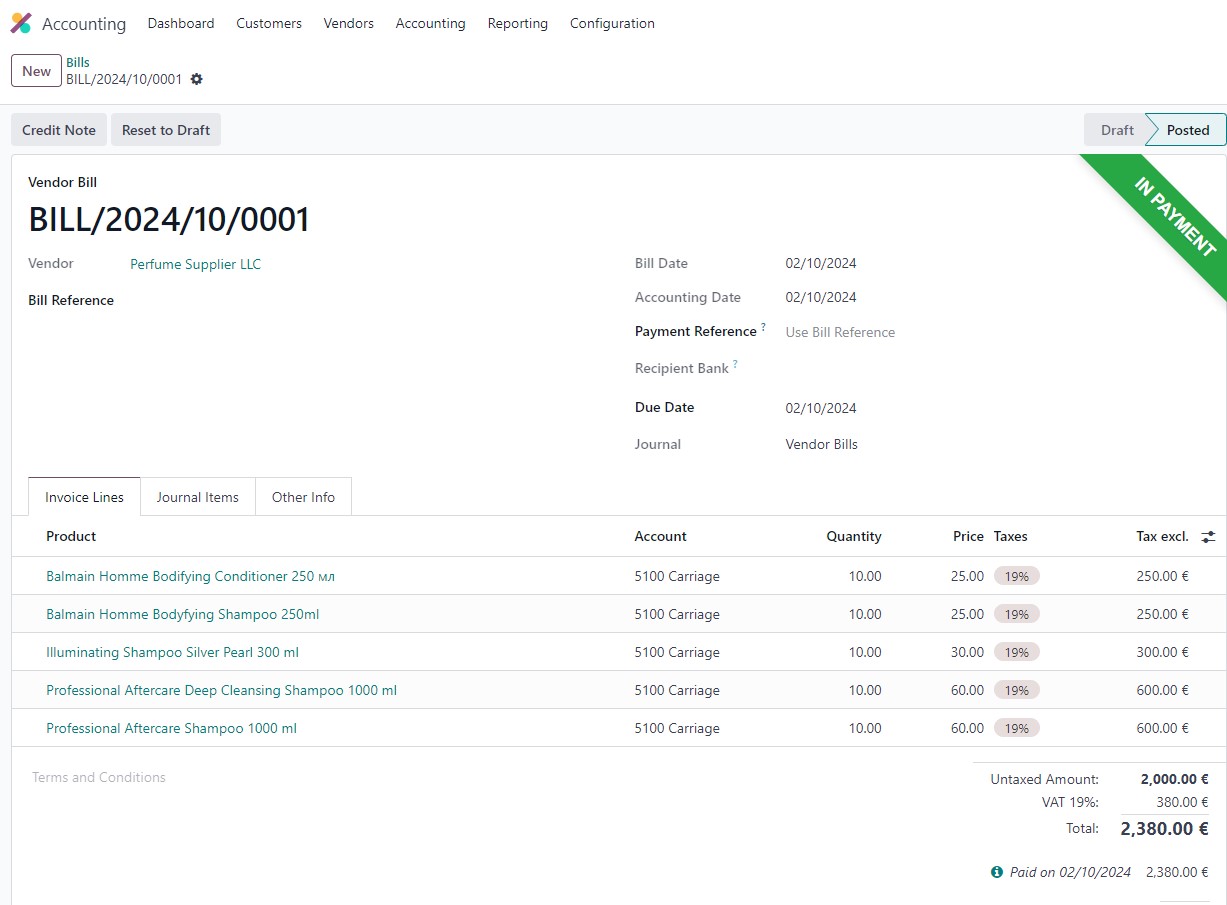
The statuses of invoices are displayed directly in the list.

eCommerce
All related products have also been entered into the system and published in the online store. As I mentioned earlier, the online store in Odoo ERP is one of the system modules that is directly integrated with the website.
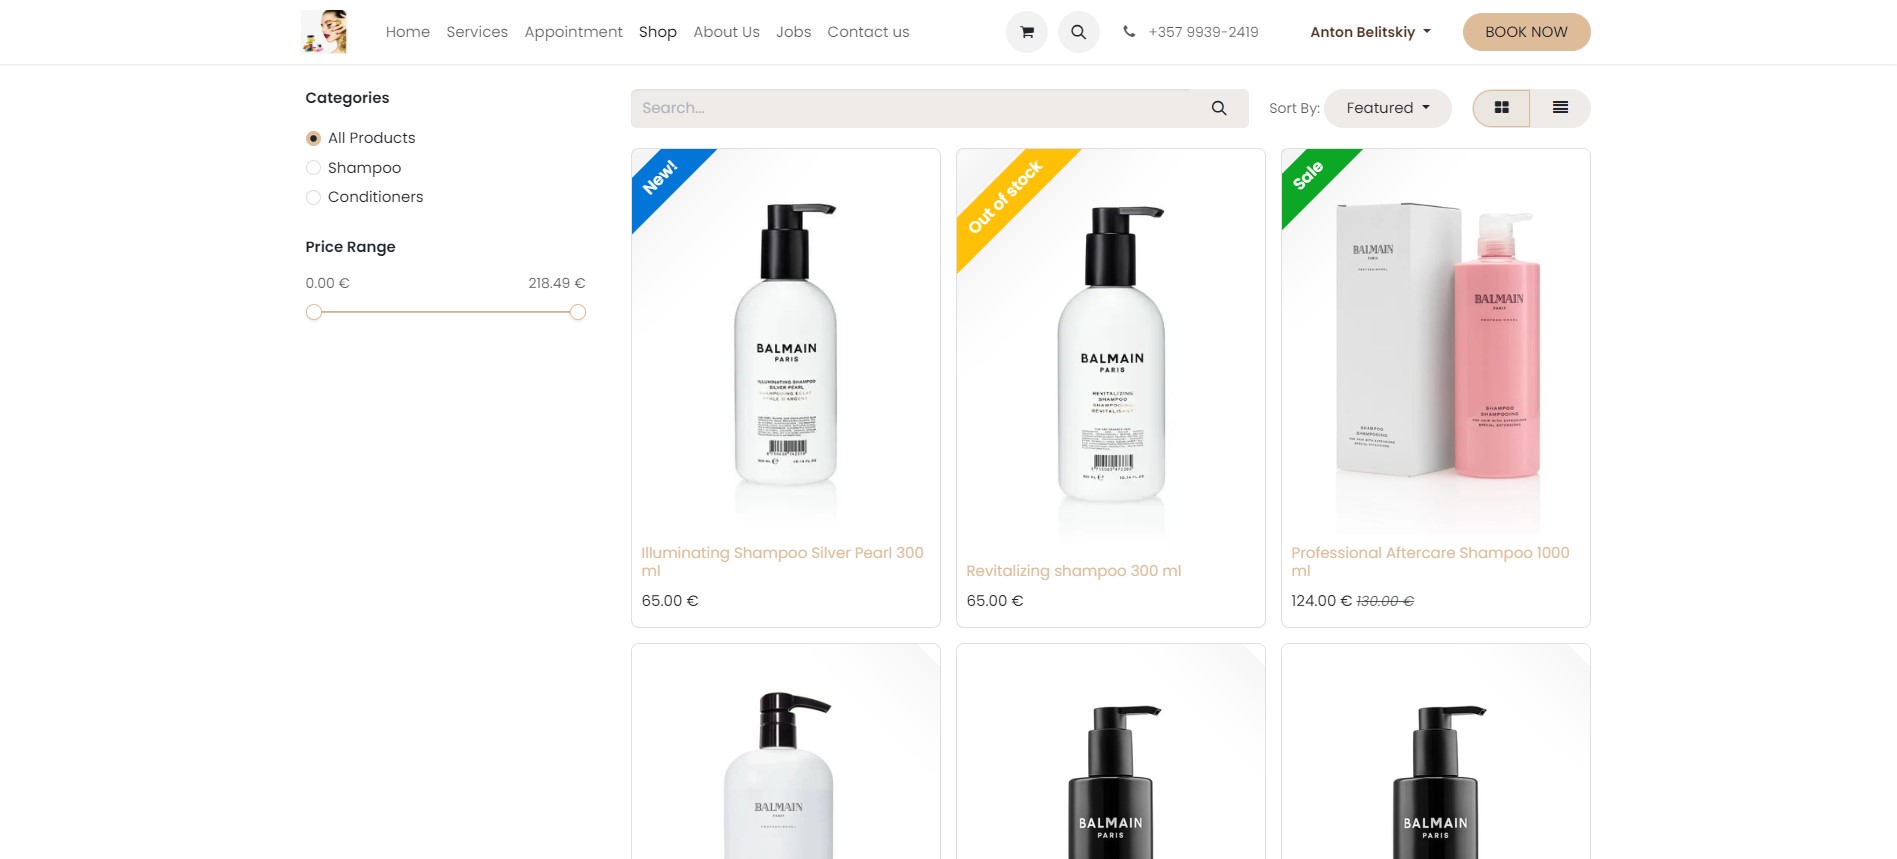
To make a product appear in the online store, it is sufficient to specify its “e-commerce” category and publish it on the website. All that needs to be done is to provide a product description, set prices, indicate availability, and upload photos. After that, with just one click on the "Publish" button, the product becomes available for purchase on the site.
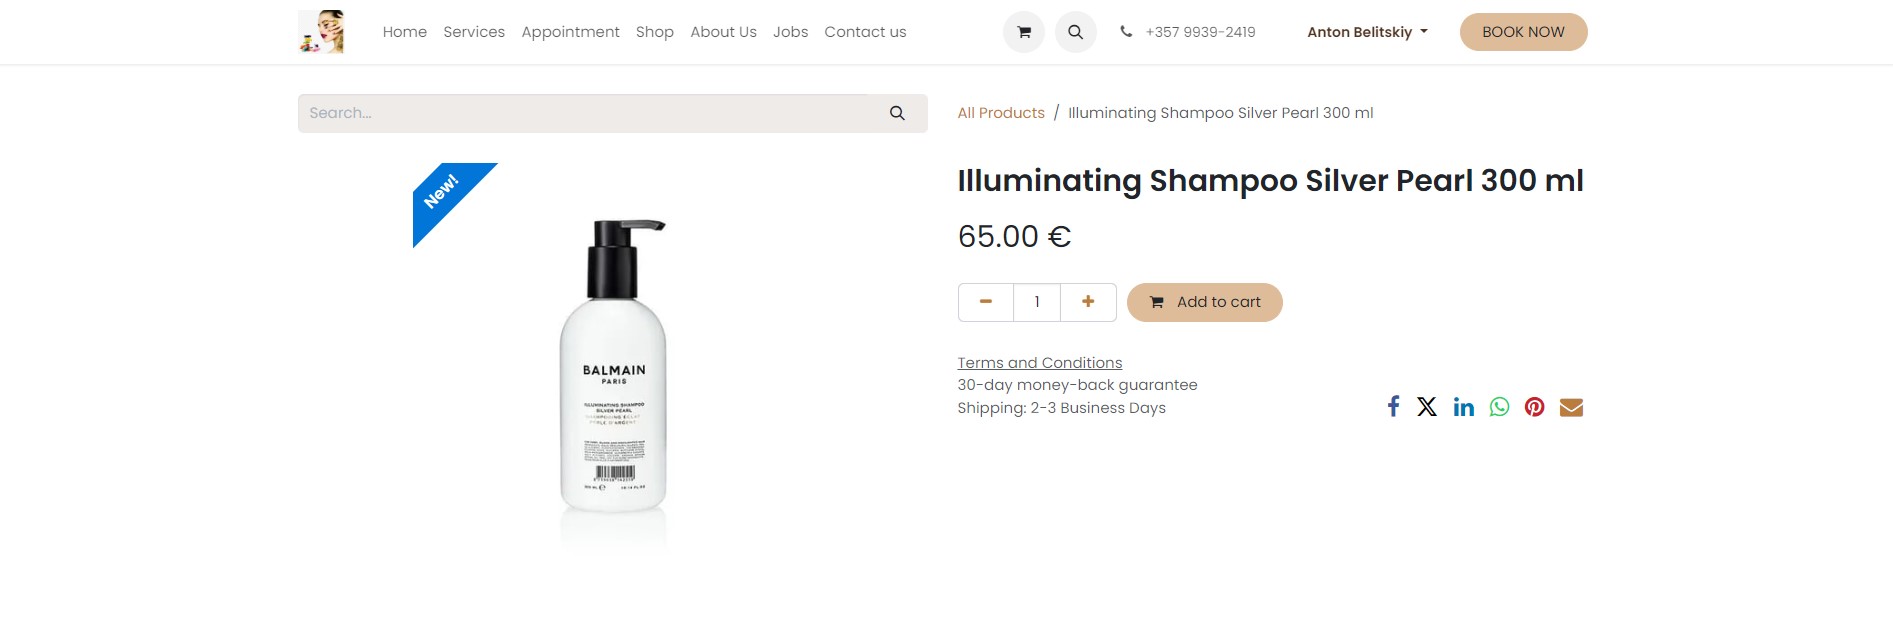
This integration allows us to manage the assortment, prices, and promotions in real time, as well as keep track of sales and inventory levels. Thanks to Odoo's functionality, the process of managing the online store has become much easier and more convenient, which contributes to improving the customer experience and increasing sales. Now our customers can easily find and order products, which undoubtedly has a positive impact on our overall effectiveness.
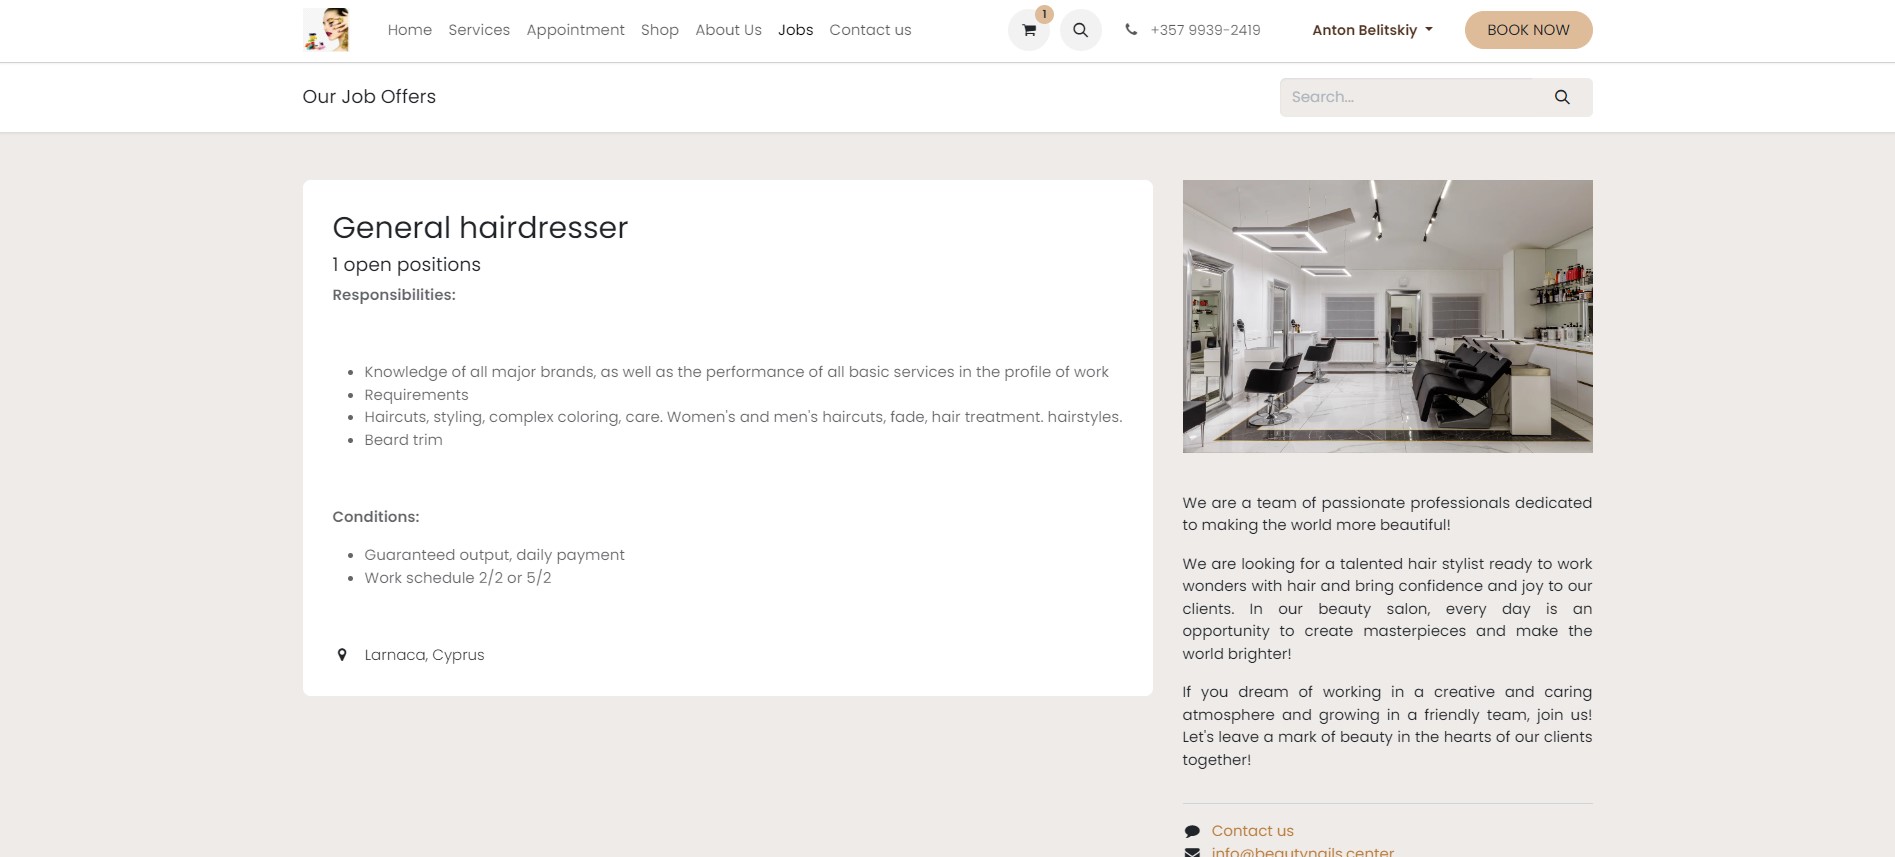
Recruitment
In the recruitment section, we enter information about the company's job vacancies—they are also displayed on the website in the "Jobs" section.
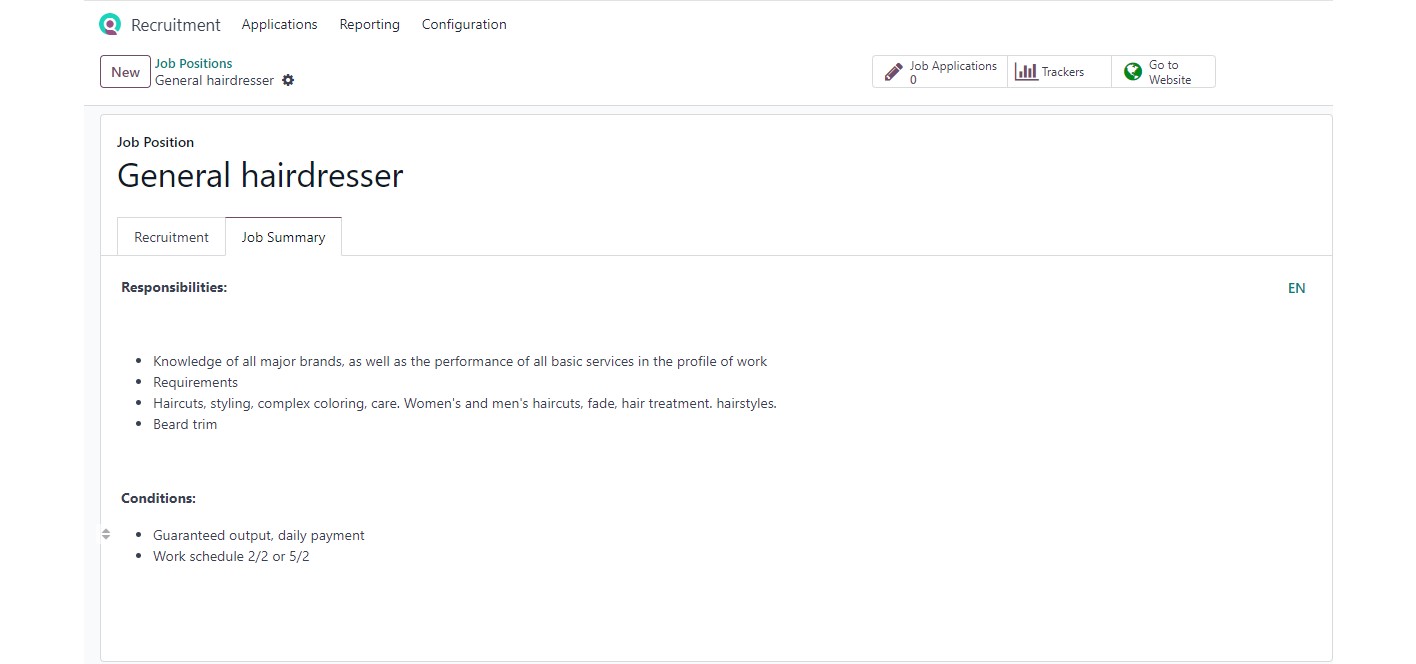
To do this, simply toggle the "Published" switch on the job vacancy page.
PoS (Point of Sale)
The next step is to set up the parameters of the PoS (Point of Sale) system. We enter the data about the name of the sales point, the types of prices used, and the tax accounting rules. If desired, we configure receipt printing parameters. Then we go to the POS module and select the necessary sales point. We open a shift and record sales. When opening a shift, we indicate the amount of money in the cash drawer, if necessary, specifying the denominations and quantities of bills and coins.
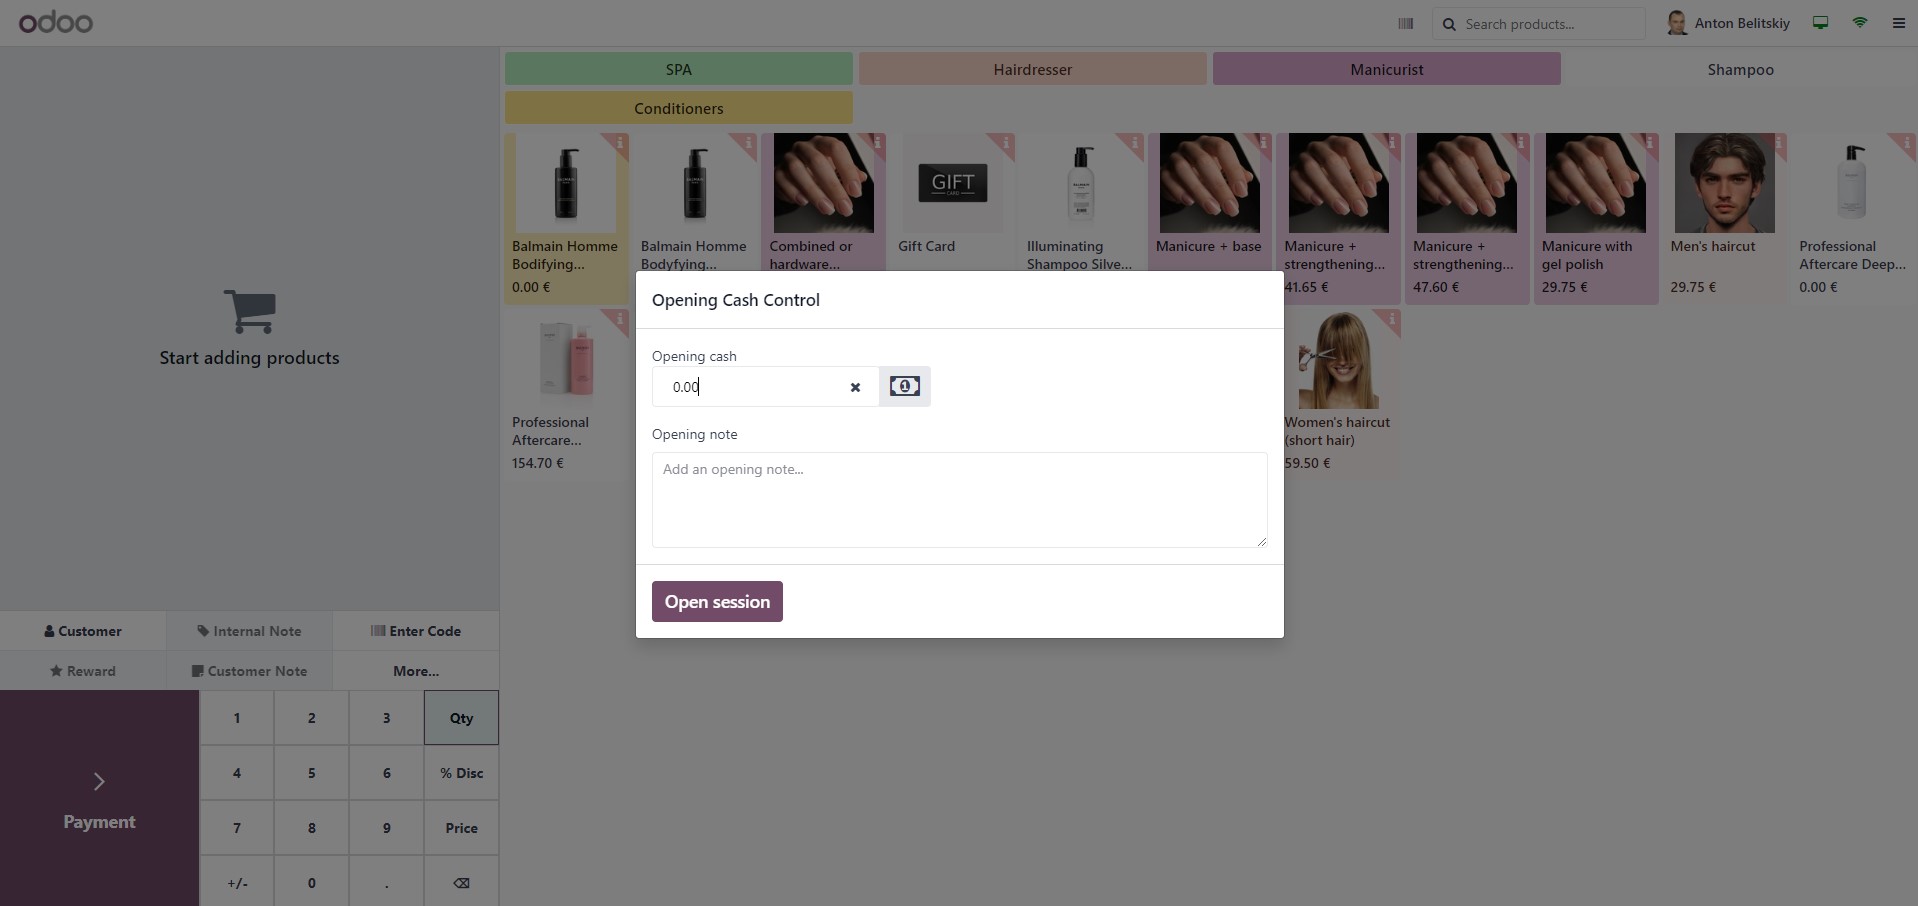
The POS screens are designed with touchscreen functionality in mind and can be opened on computers, tablets, and even mobile phones. Yes, you can even turn a mobile phone into a POS! The product panel includes quick filters according to the configured categories.
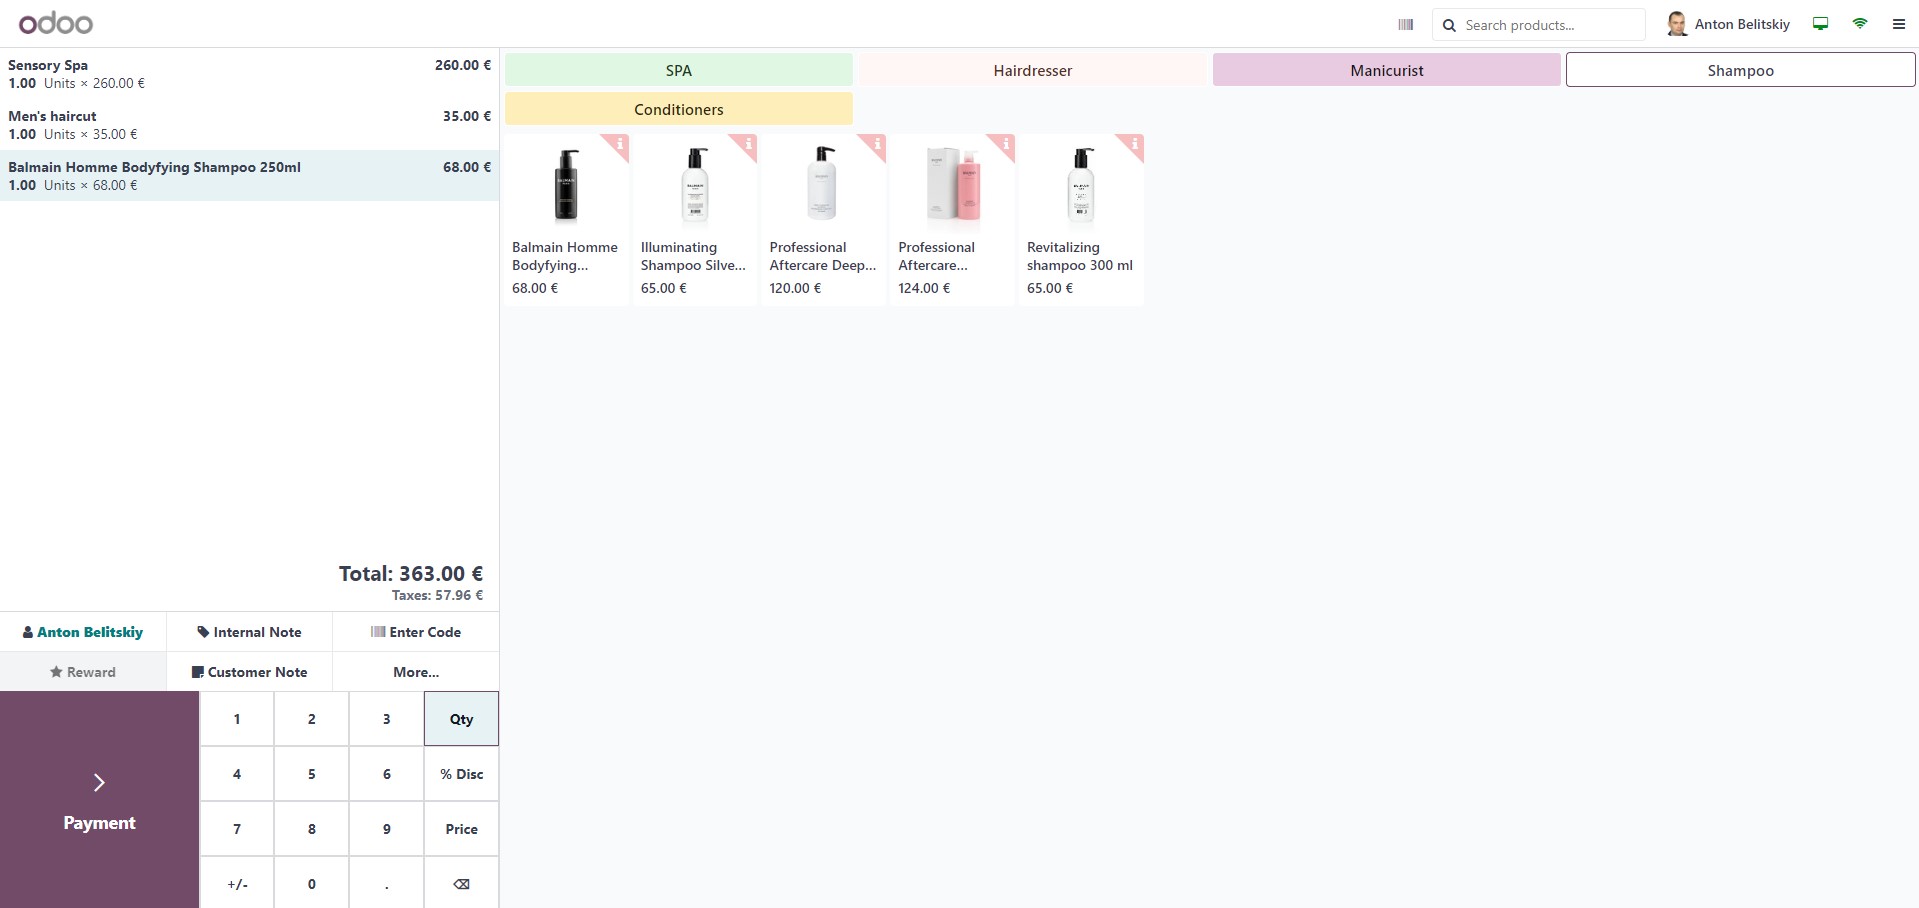
The necessary retail equipment can be connected to the POS: a customer display, barcode scanner, receipt printer, cash drawer, and POS terminal for card payments.
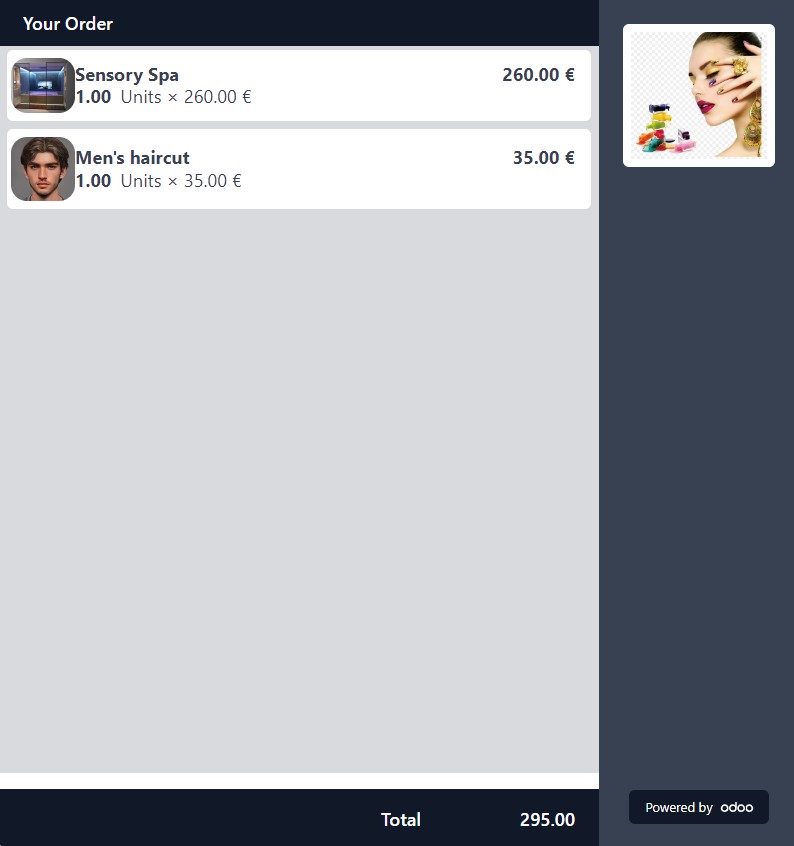
We complete our first sale by selecting the product manually or scanning its barcode, and it gets added to the receipt. All the data we enter can be displayed on the connected customer display. It’s worth noting that in the provided example, the default settings are used, which can be adjusted to meet the needs of each business.
Now we move on to registering payment. We can choose cash, card payment, or billing the customer. If the customer is registered in the system, their data can be filled directly from the POS interface. We can also consider discount cards, vouchers, coupons, and other loyalty marketing tools.
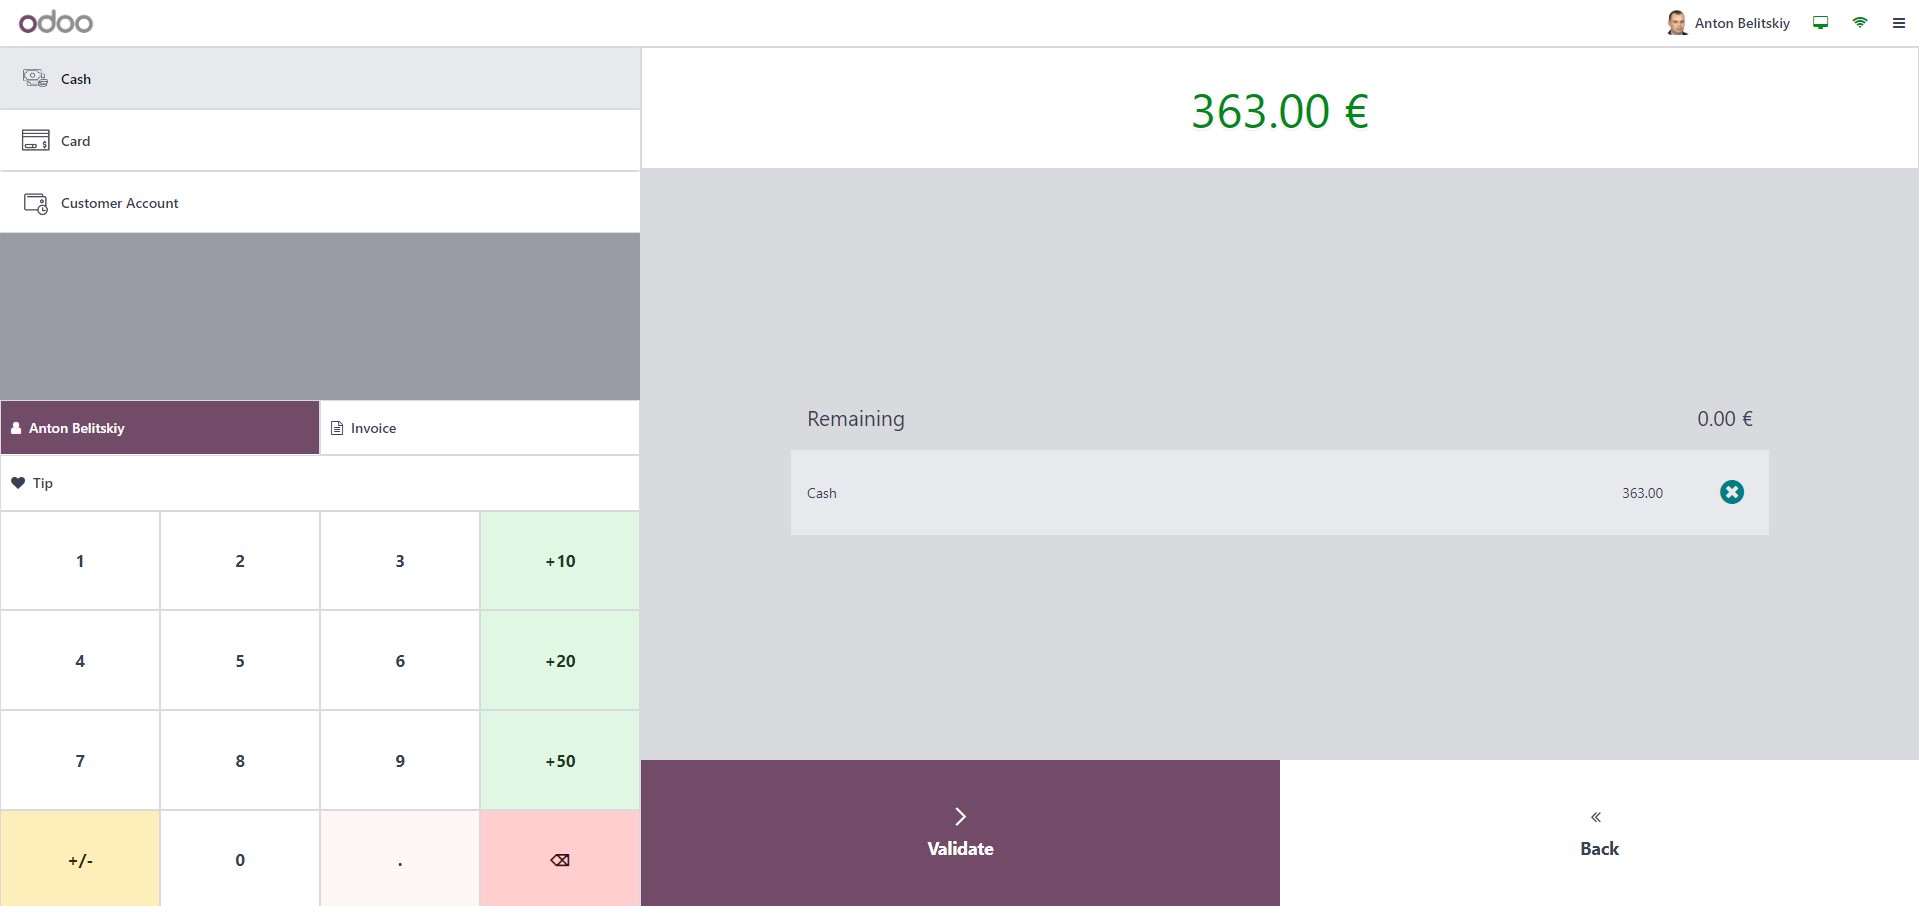
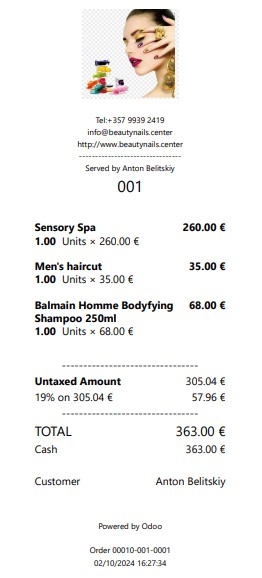
Once payment is confirmed, the receipt is automatically printed, and the format can be customized to fit the style of your salon.
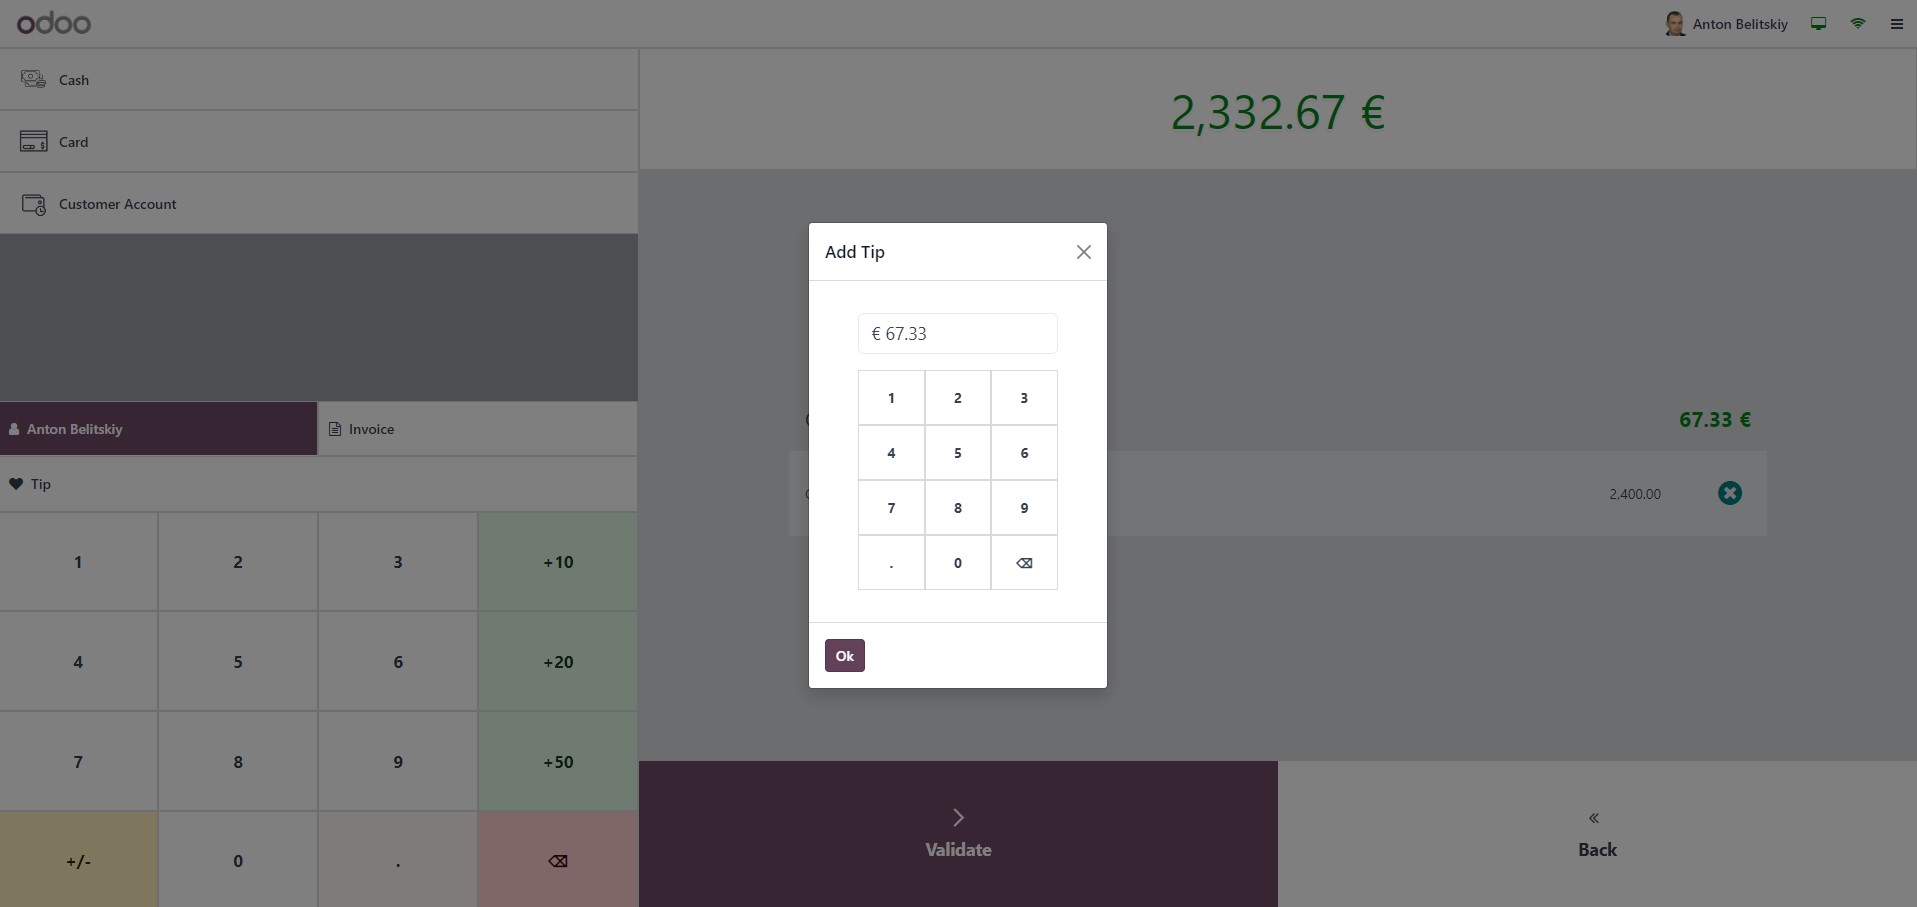
Additionally, a gratuity accounting mechanism has been implemented – tips can be specified as the entire change amount or a specific amount if needed.
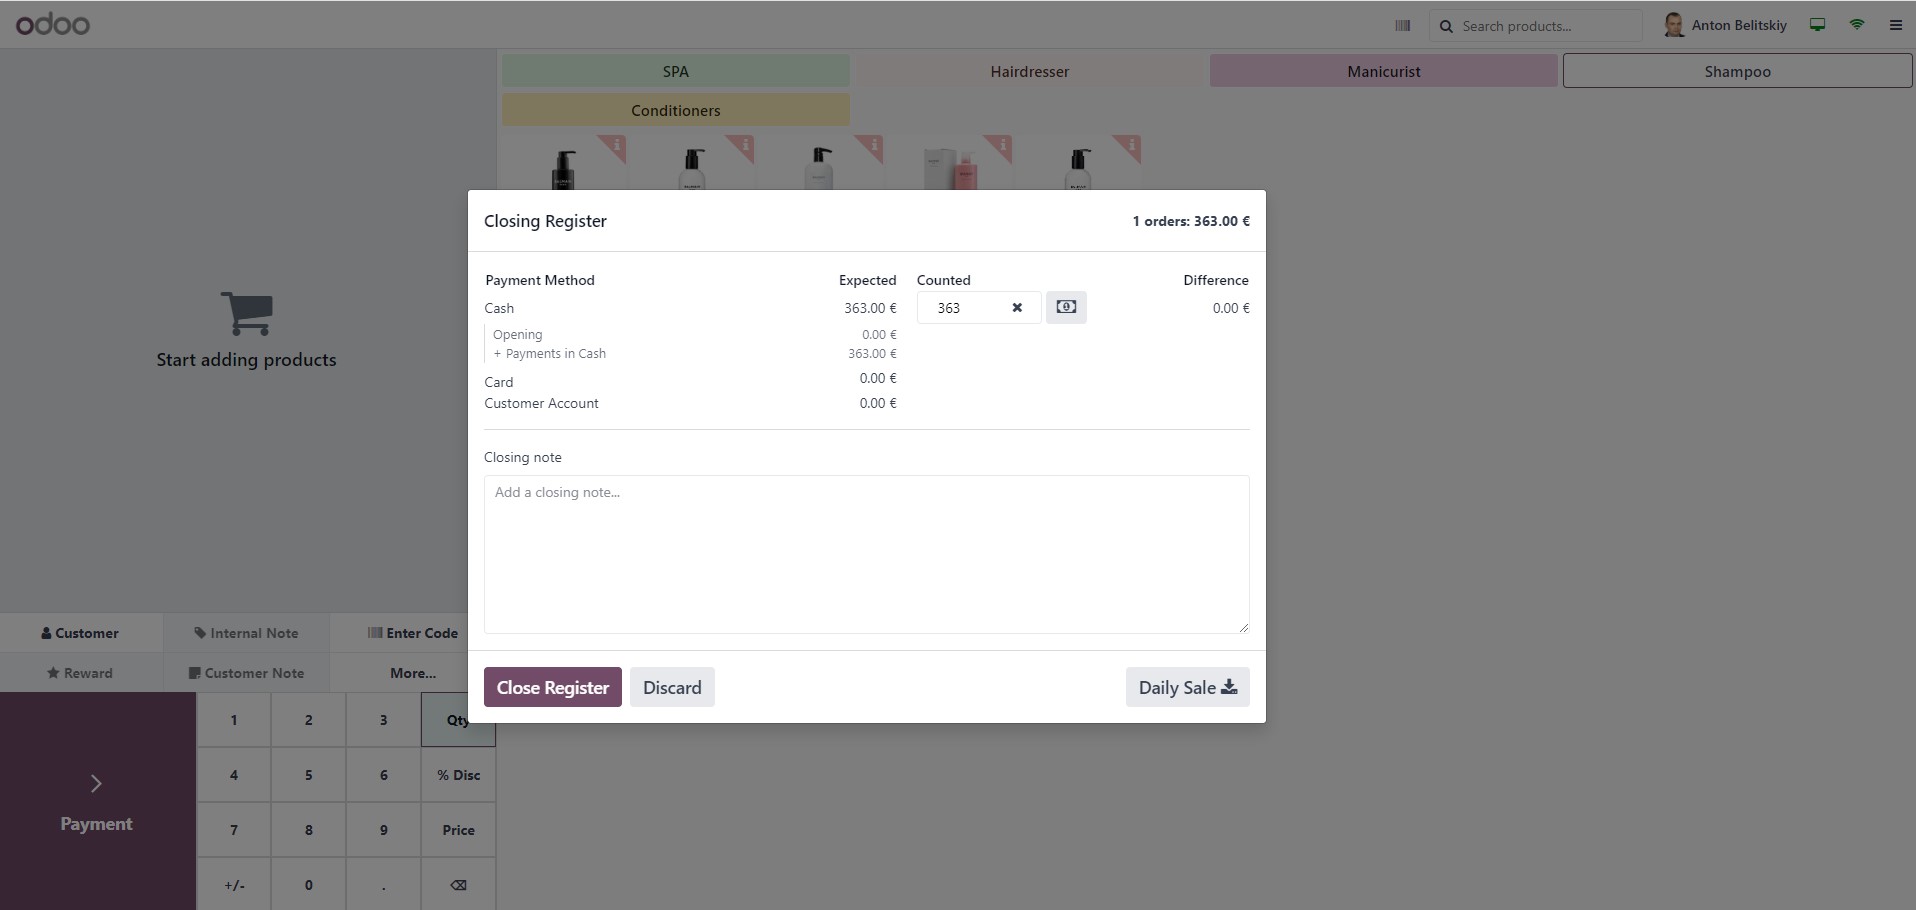
After completing the cash shift, we close it by specifying the remaining funds in the cash drawer.
All registered sales are automatically reflected in other accounting sections, such as orders and payments.


Analytical reporting
Thus, we have the main events of enterprise operations recorded in the system. All accumulated information can be analyzed to improve customer service quality and economic efficiency.
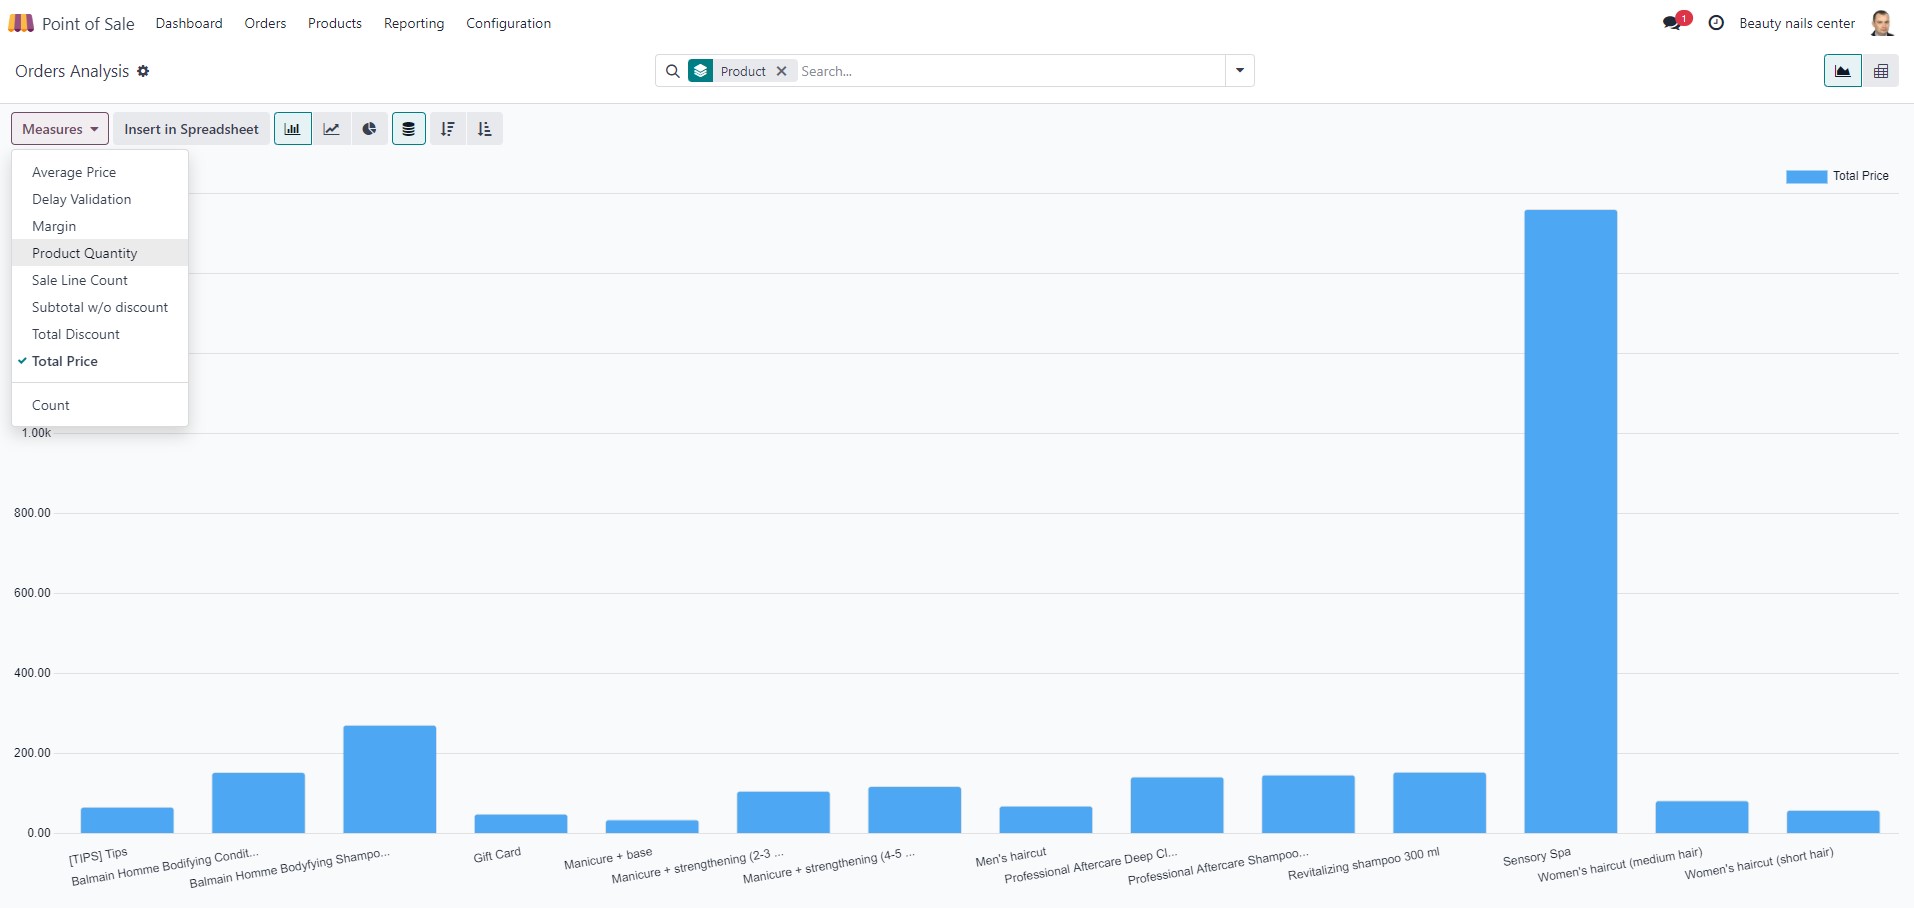
Most analytical reporting can be generated from list forms by configuring groupings and filters. Numerous built-in analytical reports are also available. For example, in the POS module, you can view sales analytics in various breakdowns, such as sales amounts or profitability.
Accounting
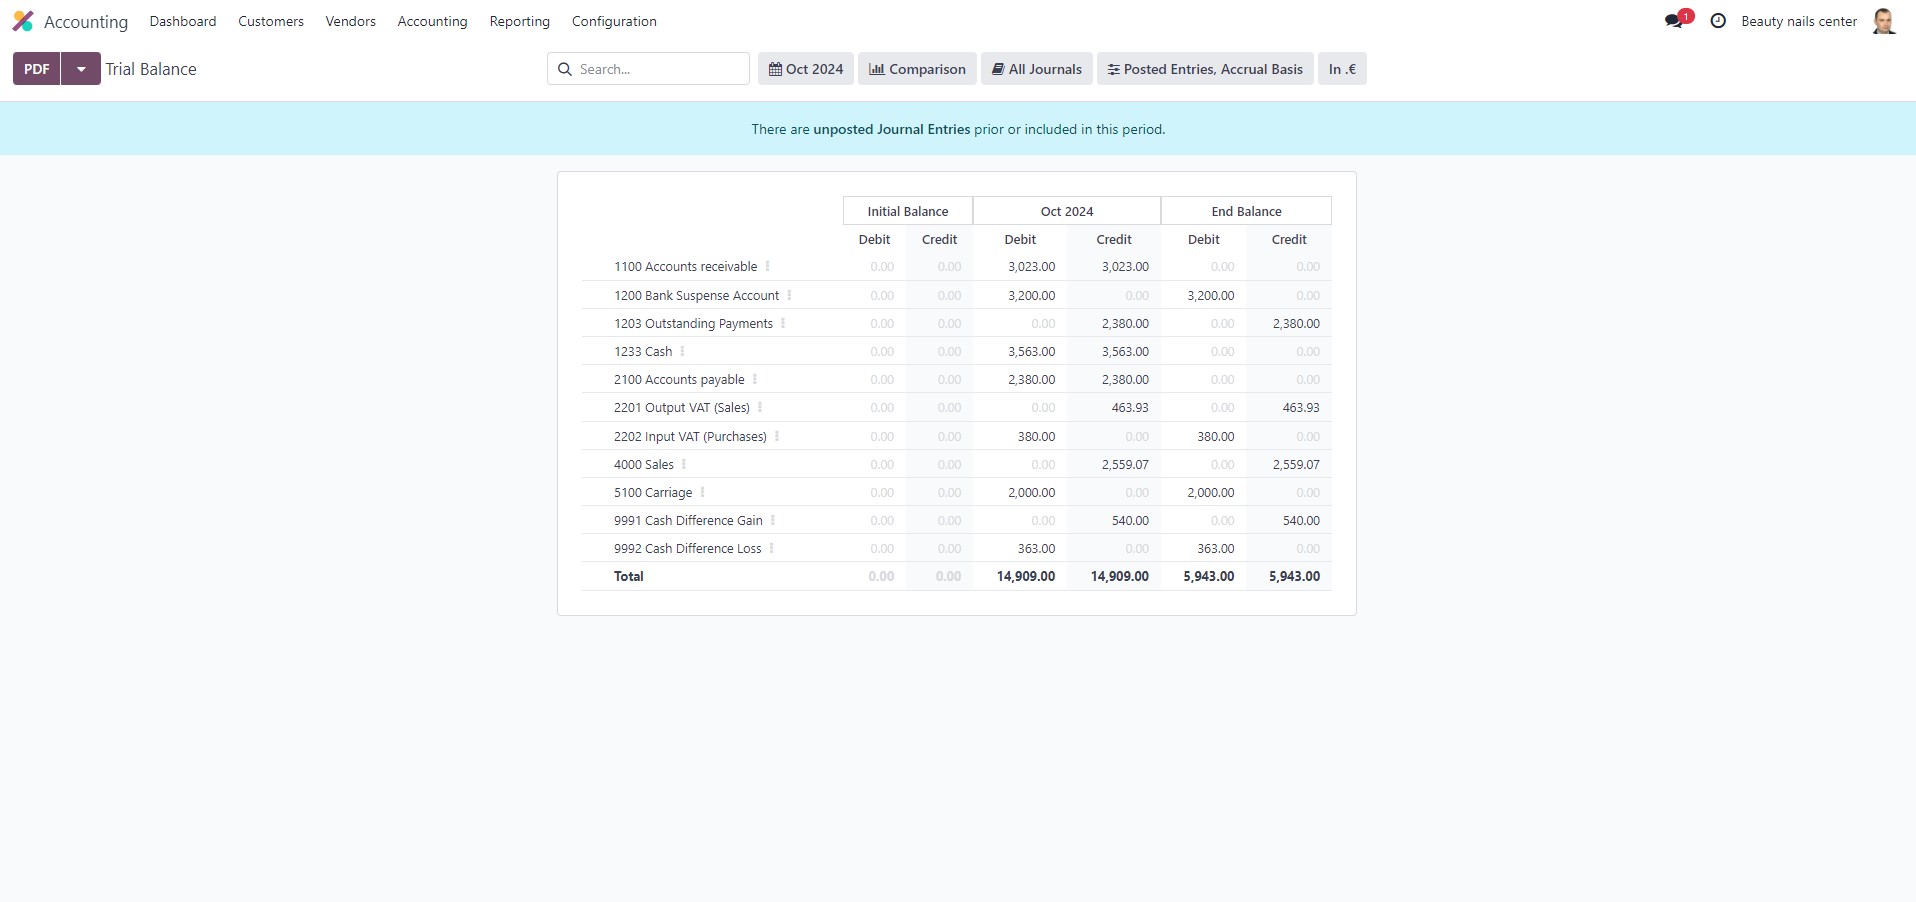
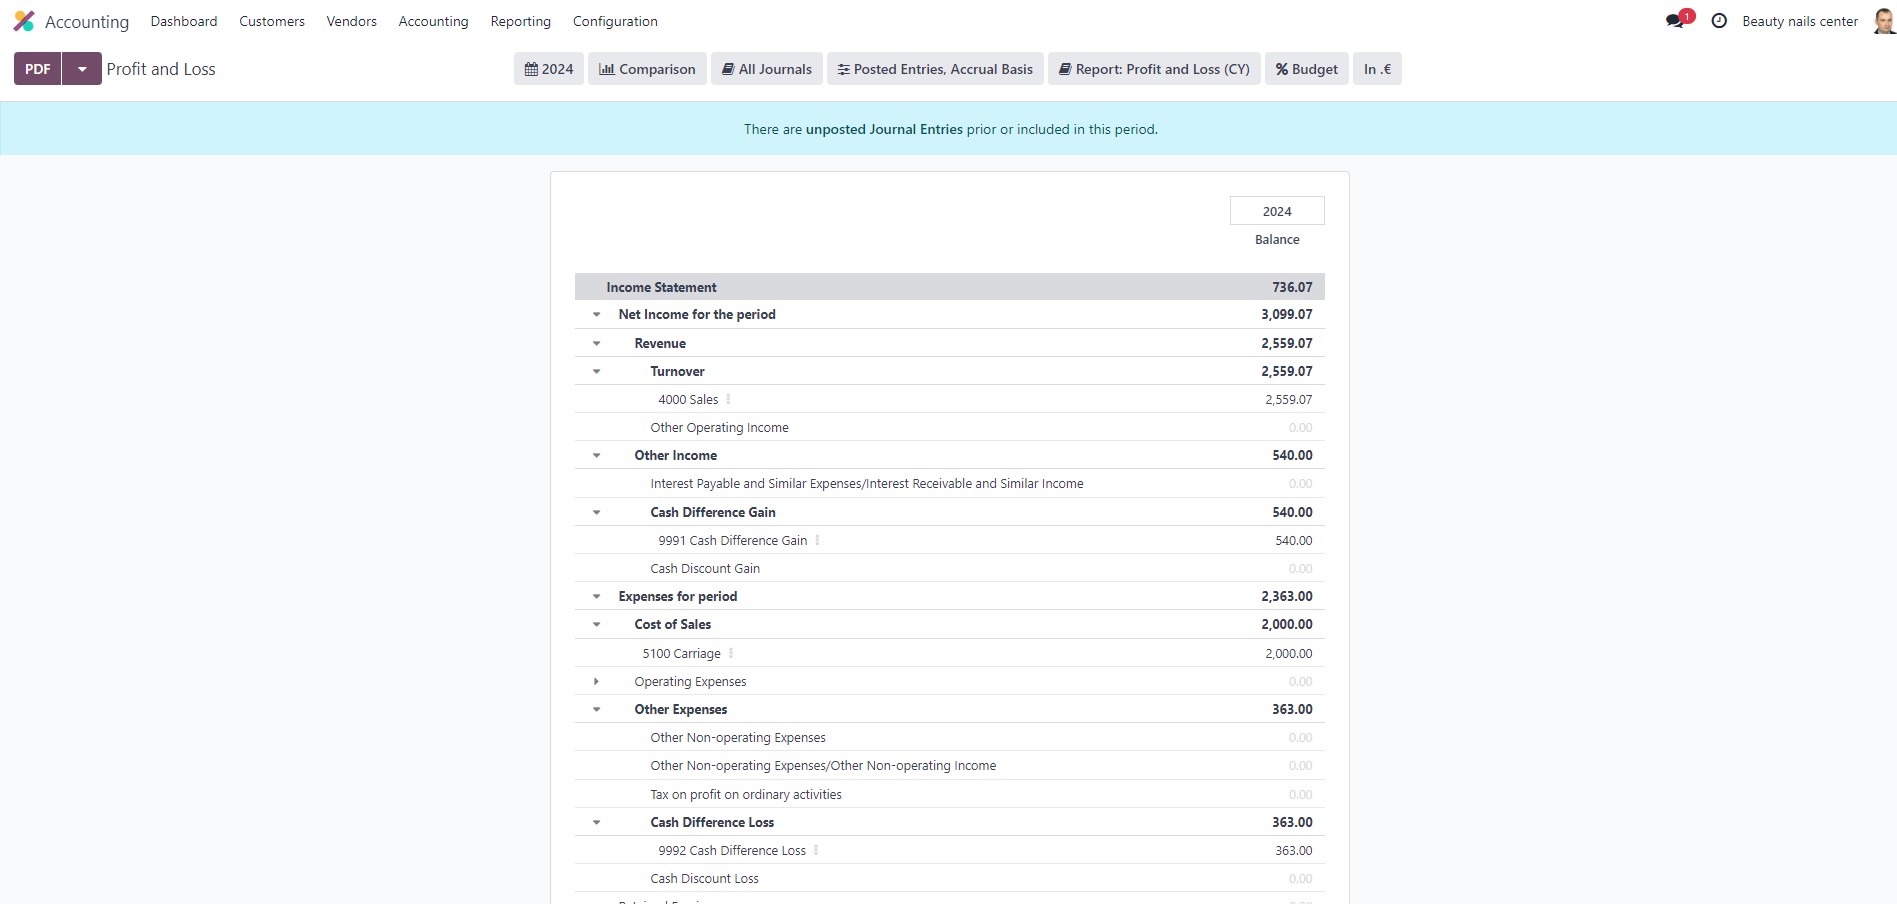
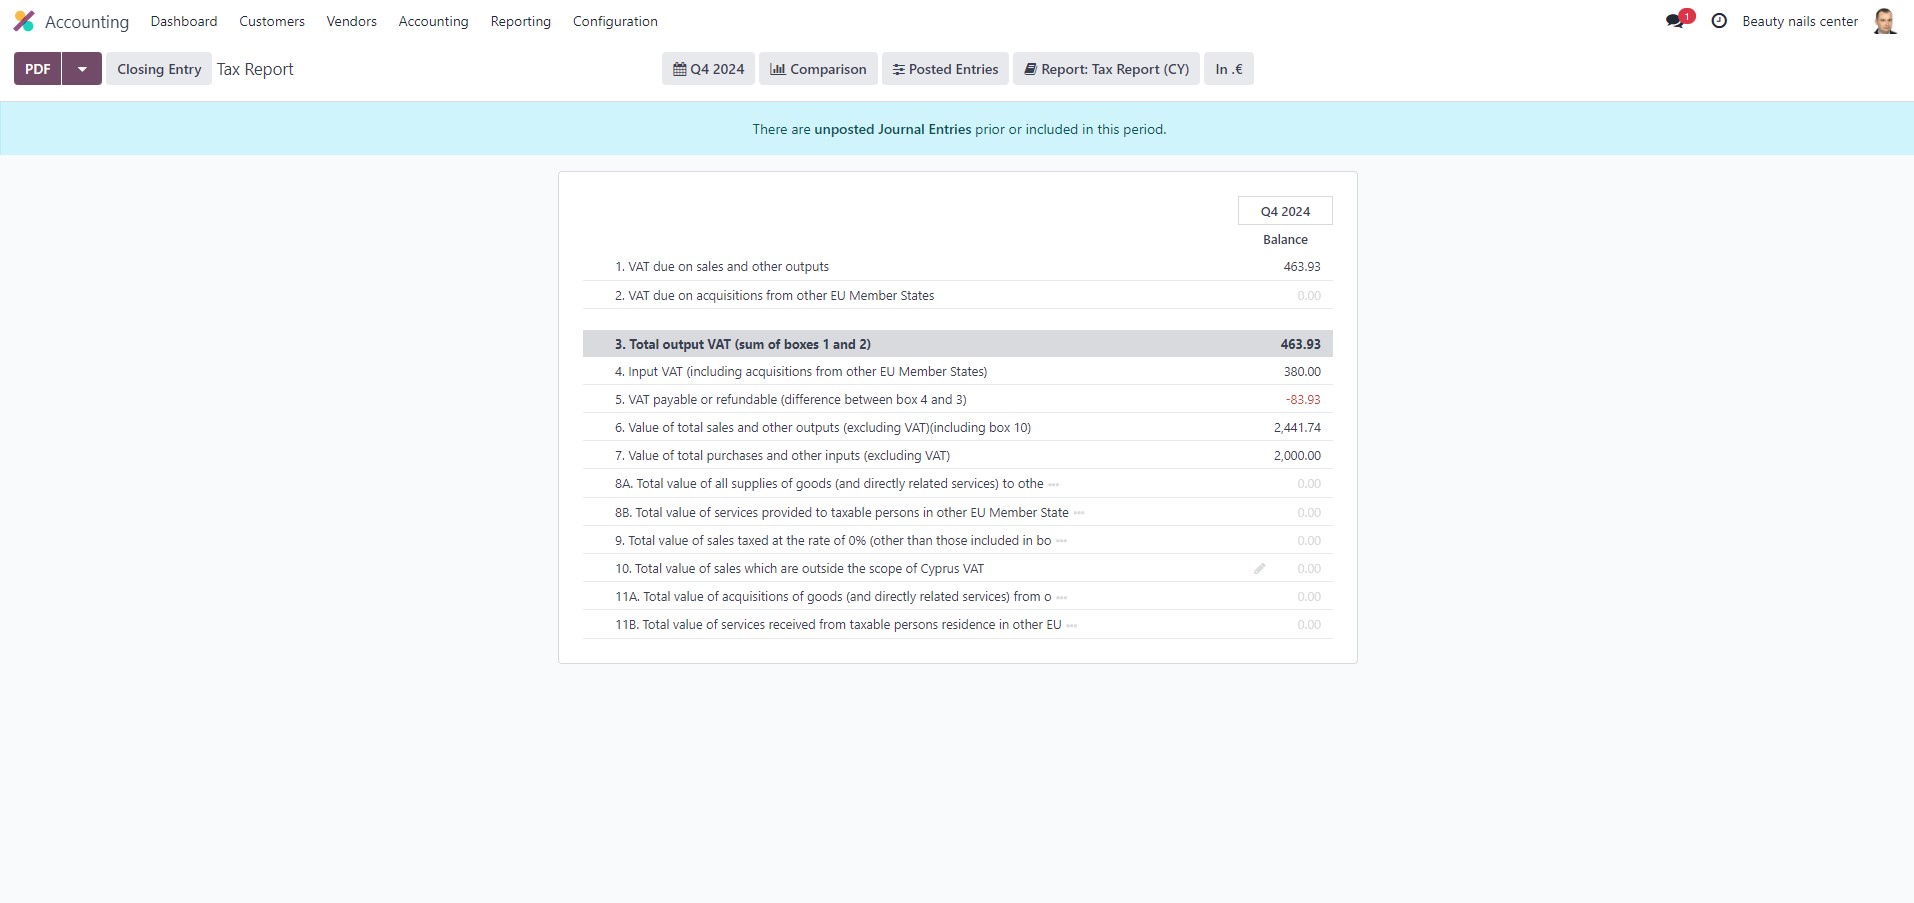
By installing the "Accounting" module, accounting reports become available, including in the format of the country of residence. We can obtain reports on balance, profits and losses, taxation, settlements with partners, and more.
Balance:
Profit and Loss:
Tax Report:
Partner ledger:

And much more...
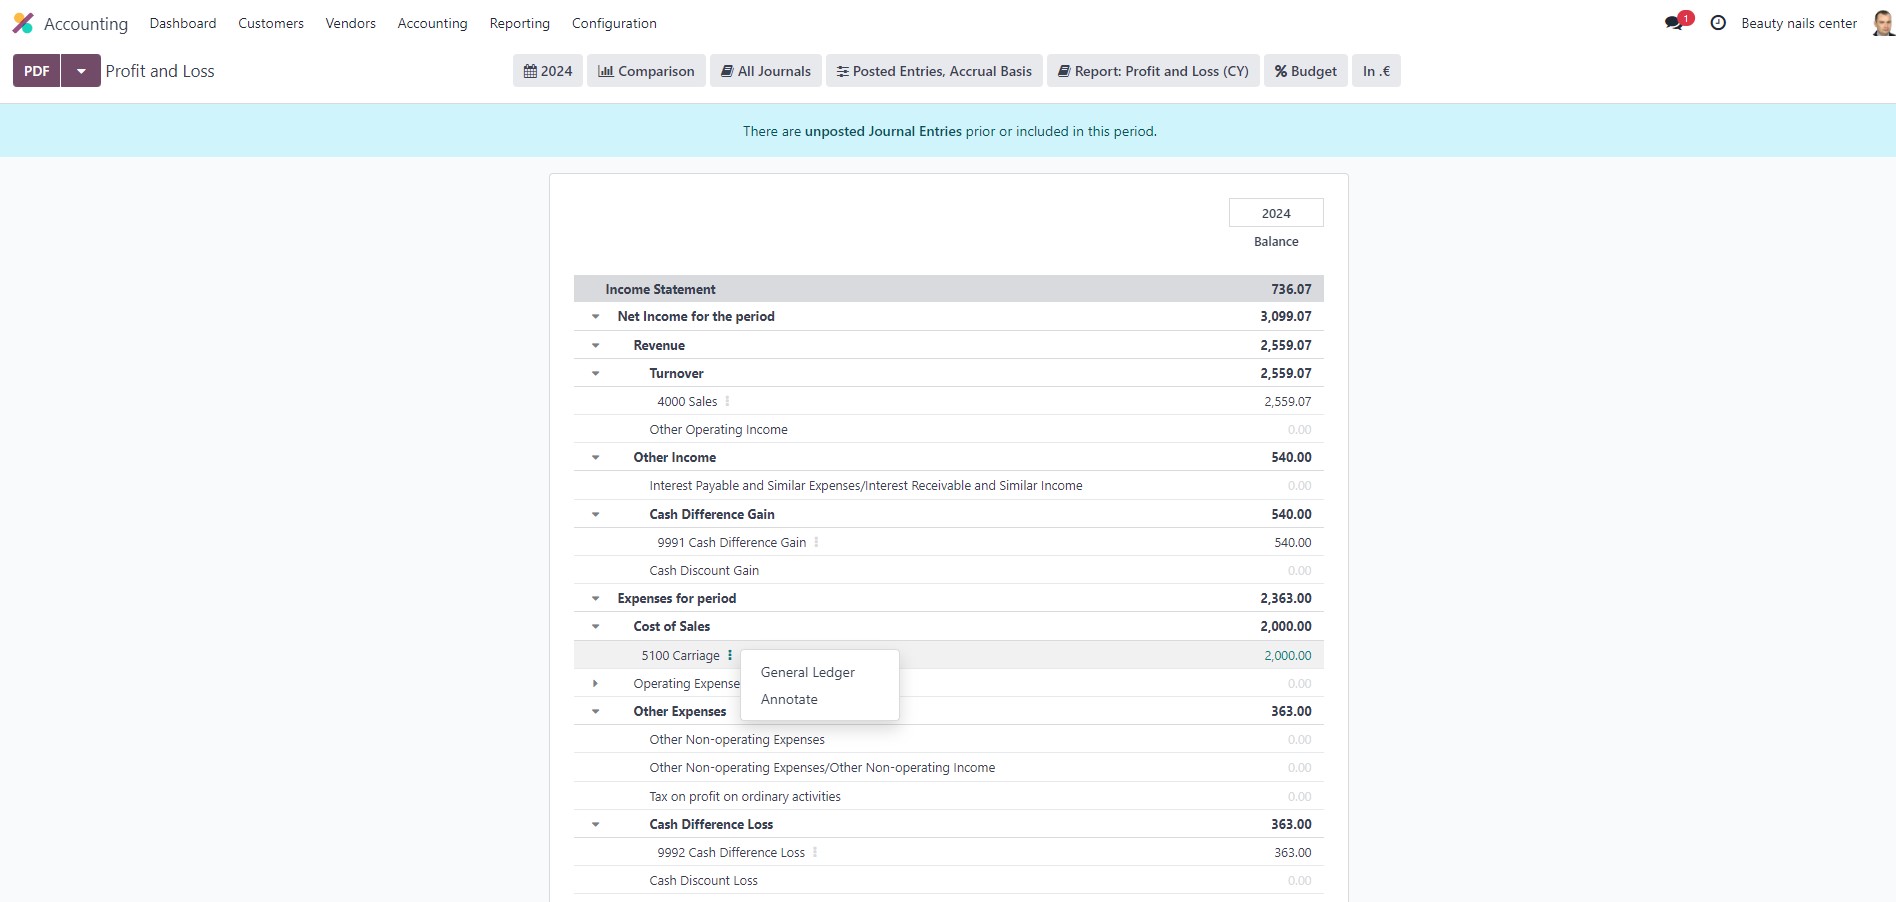
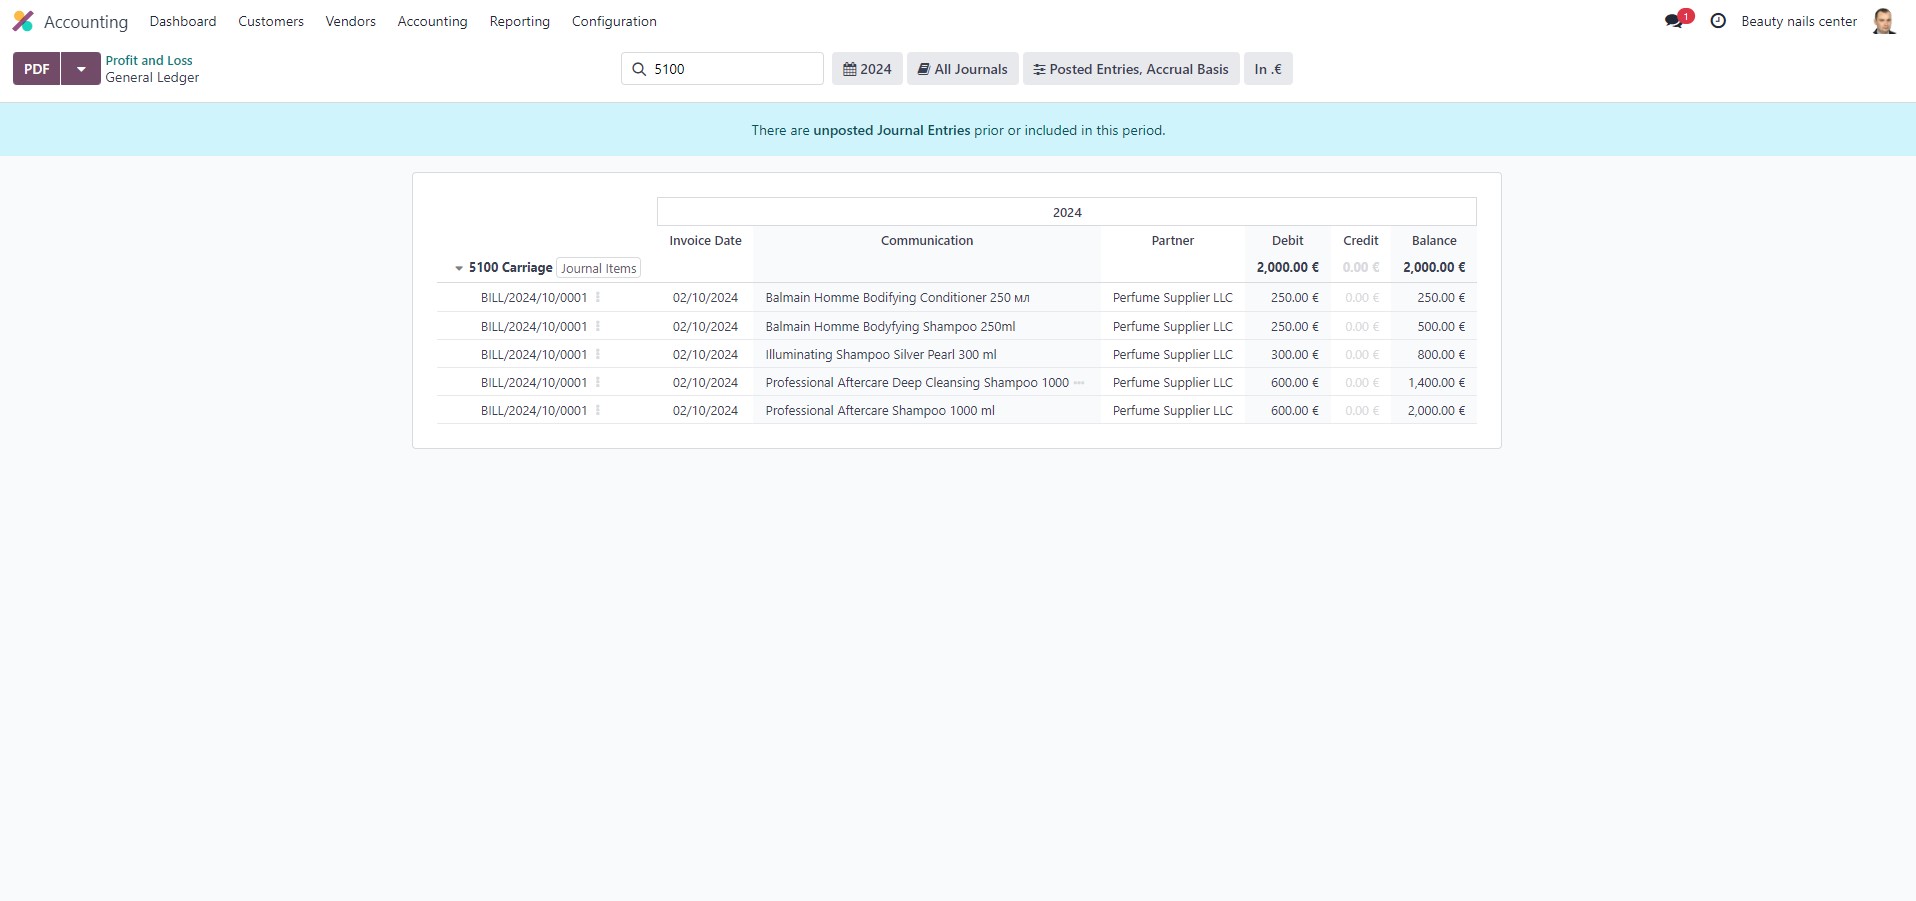
Each indicator can be detailed down to the list of documents that changed it, ensuring an in-depth analysis of all business processes.
Summary
Thus, the implementation of Odoo ERP has significantly structured the salon's operations, reduced the time spent on managing business processes, and improved customer service quality. Managers have been freed from routine tasks and can now focus on more important aspects of client interaction, which will undoubtedly positively impact customer satisfaction and attracting new clients.
Automation of a beauty salon and SPA using Odoo ERP